How to Install an Adhesive Trunk Spoiler Without Drilling: The Complete 2026 Guide
Installing a trunk spoiler yourself without drilling: it's possible and easier than you think
The trunk spoiler is probably the most effective tuning accessory for transforming the silhouette of a car: it visually lowers the rear, elongates the line, gives an immediate sporty look and, on well-designed models, adds a real premium touch reminiscent of M, RS, S-Line or AMG versions. The big question everyone asks before getting started is always the same: do you have to drill the bodywork to attach it? The answer, in the vast majority of cases, is no. Most modern spoilers are attached using 3M double-sided adhesive, a clean, strong, durable and above all completely reversible method if done correctly.
In this comprehensive guide, you will learn how to install an adhesive spoiler without drilling, step by step, even if you have never worked with a bodywork accessory. We will cover the vocabulary (spoiler, wing, blade), the difference between adhesive installation and screw-in installation, the essential tools, surface preparation (the most important step of all), the ideal temperature for the adhesive to bond, sealing, the curing time, without forgetting the mistakes to avoid and a look at legality and the technical inspection. By the end, you will know exactly how to achieve a clean, durable installation worthy of an original finish.

Spoiler, wing, blade: what exactly are we talking about?

Before installing anything, let's get the right words for the parts, because confusion is common and can lead to buying the wrong product. All these accessories modify the aerodynamics and the style of the rear, but they do not have the same shape or function.
The spoiler
The spoiler is a discreet part that is generally attached to the edge of the trunk or the hatchback, as an extension of the bodywork. It forms a small raised lip that extends the line of the trunk. Its role is primarily aesthetic and slightly aerodynamic: it "breaks" the airflow at the top of the trunk to refine the style and, on certain fast cars, slightly reduce rear lift. It is the best-selling accessory because it integrates seamlessly, without distorting the car. The corresponding English term is lip spoiler or ducktail ("ducktail") for the most raised shapes.
The wing
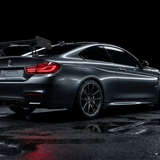
The wing is more imposing: it is an elevated structure, often mounted on supports (feet), that stands out clearly from the bodywork, like on race cars. Its look is much more radical and sporty. In everyday language, "spoiler" and "wing" are often used interchangeably, but technically the wing is the large part on feet, while the spoiler is the integrated lip. Our Audi A4 S4 S-line B9 trunk spoiler is a good example, halfway between elegance and character.
The bumper blade
The bumper blade (or splitter) has nothing to do with the trunk: it is mounted at the very bottom, on the front or rear bumper, to visually lower the car and complete the style. We mention it here simply to clear up any ambiguity: if your goal is the rear of the trunk, you need a spoiler or a wing, not a blade. We actually have a dedicated tutorial for it.
3M adhesive installation or screw-in installation: which one to choose?
There are two main methods for attaching a spoiler: adhesive or screwing/drilling. The comparison chart below summarizes everything you need to know to choose with full knowledge.
For the vast majority of trunk spoilers and lightweight ABS wings, the adhesive installation is not only sufficient, but often recommended by the manufacturer. The 3M VHB adhesive (Very High Bond) used on automotive accessories is a high-performance acrylic tape, designed to withstand temperature fluctuations, vibrations, rain, UV and high-pressure washing. Once installed under the right conditions, a glued spoiler will not move for years. Drilling, on the other hand, remains reserved for very large competition wings or installations where the manufacturer explicitly requires it.
What do you need to install your spoiler?
The good news is that the tools are minimal and inexpensive. Here is the complete list for a successful adhesive installation:
For cleaning and preparation: a clean microfiber cloth, isopropyl alcohol (or a silicone-free bodywork degreaser), and possibly a preparation wipe provided in the kit. This is the most important piece of equipment in the set.
For positioning: masking tape (painter's tape), a tape measure or ruler, and an erasable marker or thick pencil to mark the axes. These tools guarantee a perfectly centered and straight spoiler.
For gluing: the spoiler with its 3M adhesive already applied at the factory (the most common), or a spare roll of 3M VHB double-sided adhesive if needed. A hair dryer or a heat gun set to low helps activate the glue in cool weather.
Comfort: work in a garage or sheltered area, at a temperature of around 20 °C, on a clean and dry car. Plan not to wash the car for the following 72 hours. That's it: no need for a drill, putty or specialized tools.
The most important step: prepare and degrease the surface

If you were to remember only one thing from this guide, it would be this: the hold of an adhesive spoiler depends 90% on surface preparation. A 3M adhesive, no matter how high-performance, will only bond correctly to a perfectly clean, dry, and degreased surface. The slightest trace of wax, silicone, dust, grease, or even a fingerprint creates a micro-layer that prevents the glue from biting. This is the number one cause of spoilers peeling off after a few weeks.
Proceed as follows: start by washing the area of the trunk with soapy water, then dry it. Next, soak a microfiber cloth with isopropyl alcohol and vigorously rub the entire bonding area. Be thorough: you must remove all protective wax and all polish residue, which are precisely designed to make water slide off... and therefore prevent glue from sticking. Pass the cloth several times, changing sides, until it no longer comes out dirty. Then let the alcohol evaporate completely (1 to 2 minutes) before gluing. From that moment on, do not touch the area with your fingers.
Useful little warning: on a freshly painted car (bodywork or a part that has been repainted), the paint must be completely cured, which can take several weeks. Gluing an adhesive to paint that is still fresh can mark the lacquer or prevent proper adhesion. If in doubt, wait or ask your body shop for advice.
Temperature: the parameter everyone forgets

The 3M acrylic adhesive needs heat to activate and reach its full bonding strength. Installed in cold weather, it remains rigid and does not "conform" to the surface: this is the classic mistake of failed installations in the middle of winter in a parking lot. The chart below illustrates the ideal temperature range.
The rule is simple: install your spoiler when the part and the bodywork are between 15 and 25 °C. If you do not have a heated garage and it is cold, there are two solutions: bring the part inside to warm up a few hours before installation, and warm the bonding area of the trunk with a hair dryer just before applying, then pass heat over the spoiler once installed to help the adhesive flow and perfectly conform to the sheet metal. Conversely, avoid gluing in direct sunlight on burning hot bodywork: the glue becomes too soft and the part can slip during positioning.
Step-by-step tutorial: install an adhesive spoiler in 8 steps

Here is the heart of the guide. Follow these 8 steps in order, without rushing. The diagram below gives you the overview, then each step is detailed right after.
Step 1 — Wash the area. Clean the trunk edge with soapy water to remove dust and dirt, then wipe and let dry. Never glue onto a dirty surface.
Step 2 — Degrease with isopropyl alcohol. As explained above, this is the crucial step. Rub the entire bonding area with isopropyl alcohol to remove wax, polish, and grease, then let it evaporate. Do not touch the surface again.
Step 3 — Position "dry". Hold the spoiler on the trunk without removing the protective film from the adhesive. Step back a few paces, check that the part is centered, straight, and symmetrical relative to the edges and the rear window. Measure the distance between each end of the spoiler and a fixed marker (trunk edge, taillights) to ensure symmetry.
Step 4 — Mark and tape. Once the correct position is found, mark it with small pieces of masking tape placed along the edges of the spoiler. These markers will allow you to put the part back exactly in the same place once the film is removed, without guessing.
Step 5 — Heat if necessary. In cool weather, pass the hair dryer over the bonding area of the trunk and the spoiler's adhesive to bring them to the right temperature. The glue will become more flexible and bond much better.
Step 6 — Remove the adhesive film. Peel off the red or transparent protective film covering the 3M adhesive. From here, avoid any contact of the adhesive with your fingers or with dust: the glue only "forgives" one application.
Step 7 — Install and press firmly. Guided by your tape markers, install the spoiler in one sure motion, then press firmly along the entire length, emphasizing the ends. 3M adhesive is instant-bond: you must therefore aim correctly on the first try. Apply firm pressure for at least 30 seconds per area.
Step 8 — Seal and let dry. Pass over the entire spoiler while pressing (this is sealing) to push out the air and maximize the glue/bodywork contact. Check that no edge is lifting. Then leave the car alone: no washing, no handling, while the glue builds up its strength (see the curing section).

▸ Our recommended accessories


Curing: the patience that makes the difference
The 3M VHB adhesive has a particularity: it "takes" immediately, but it reaches its maximum strength gradually, over the hours. This is what we call the build-up of cohesion. The chart below shows the evolution.
Concretely, remember these milestones: the glue already holds well after 20 minutes, it reaches about 90% of its strength after 24 hours, and its maximum strength after 72 hours. The instruction is therefore clear: do not wash your car for 72 hours, avoid the pressure washer on the area for at least a week, and do not pull on the spoiler. This patience is the secret of an installation that will last for years. If you heated the part at the time of installation, the build-up will be even more pronounced.
Raw, primed or painted spoiler: should it be painted?
Spoilers are sold in several finishes, and the choice influences the final result. The Glossy Black and Carbon Effect versions are ready to install: they are glued as they are for a bold, very trendy contrast, which requires no paint. This is the case of our BMW 4 Series F32 F33 F36 M Performance spoiler, available in several finishes depending on the desired look.
If you want a spoiler painted in the exact color of your car (for a seamless, factory-finished look), choose a raw (unpainted) or primed version and have it painted by a body shop or painter using your vehicle's color code before installation. It's a small extra cost, but the result is incredibly discreet. In any case, the adhesive installation method remains the same; simply stick the part on once the paint is completely dry and cured.

Special cases depending on your car
Spoiler on a glass rear window (glass hatch)
On some models (especially estates and SUVs), the spoiler is mounted at the top of the glass rear window. 3M adhesive bonds perfectly to glass, provided it is degreased exactly like a painted surface. However, be careful not to interfere with the rear wiper blade or the third brake light: position the spoiler accordingly.
Spoiler on a plastic or composite hatch
More and more hatches are made of composite material or painted plastic. Adhesive works very well on them too, again after degreasing. Simply check that the area is properly flat or that the part correctly follows the contour: a spoiler designed for your model will follow the shape of the hatch without forcing it.
Highly contoured surfaces
If the mounting area is heavily contoured, the contact between the adhesive and the bodywork is more delicate. In this case, heating the adhesive with a hairdryer is essential so that the tape flows and follows the curve, and firmly pressing it into place is even more important. This is also why you should always choose a spoiler specifically designed for your model: its shape is molded to follow your bodywork.
Errors to absolutely avoid
Sticking it to a waxed or un-degreased surface. This is by far the number one cause of spoilers coming loose. Wax and polish are the enemies of adhesive. Always degrease with isopropyl alcohol.
Installing it in cold weather. Below 15°C, the adhesive does not bond correctly. Warm up the part and the bodywork, or wait for a milder day.
Positioning it incorrectly and trying to "fix" it. 3M adhesive bonds immediately. If you stick it on crooked and peel it off to reposition it, the adhesive loses much of its strength. This is why dry fitting and using masking tape to mark the position before removing the film is so important.
Washing it too soon. A high-pressure wash within the first 24–72 hours can lift an edge that is not yet fully bonded. Wait.
Not pressing hard enough. Adhesive only reaches its full strength under pressure. Firmly pressing it into place is not optional; it is a full step in the process.
Buying a poorly fitted "universal" spoiler. A part not designed for your model risks not fitting the bodywork correctly, creating stress points that eventually cause it to come loose. Choose a spoiler dedicated to your vehicle.
Post-installation care: making your spoiler last
Once the 72 hours of drying time have passed, your spoiler is ready for everyday life, including washing, rain, and the highway. A few good habits will prolong its beauty: wash it normally, but avoid directing the jet of the pressure washer directly and very closely at the bonded edge. For Carbon Effect and Gloss Black finishes, a wipe with a microfiber cloth and, from time to time, a plastic/UV protection product will maintain the deep color and prevent fading. If you apply wax or a ceramic treatment to the car, it is not a problem: the spoiler is already bonded, and the wax will not cause it to come loose. We explain all this in detail in our dedicated maintenance guides.
Spoiler and technical inspection: is it legal?
This is a common and legitimate question. In general, an aesthetic trunk spoiler, properly secured and not protruding dangerously from the bodywork, does not cause any problems in daily use or during a technical inspection, as long as it does not create a sharp, protruding edge and does not obscure the lights or the license plate. The guiding principle for any added accessory remains to not pose a danger to other road users and to comply with regulations regarding protrusions and lighting. For added lighting elements (grille star, LED grille lights, etc.), the rules are stricter: we explain them in detail in our article on the regulations for LED grilles in France. For any official questions about equipment and road use, the reference remains the French Road Safety website.
Frequently asked questions
Does an adhesive spoiler really last?
Yes. Mounted on a properly degreased surface, at the right temperature, and firmly pressed into place, a spoiler bonded with 3M VHB adhesive will last for years without moving, even at high speeds on the highway and through car washes. Almost all spoilers sold for DIY installation use this system.
Can you remove an adhesive spoiler without damaging the paint?
Yes, that is the main advantage of adhesive installation. Heat the adhesive with a heat gun or hairdryer to soften it, then run a fishing line or dental floss behind the part to gently saw through the adhesive. Any adhesive residue can then be removed with a dedicated product. The original paint remains intact. We have a complete tutorial dedicated to this.
Do you really have to wait 72 hours before washing the car?
It is strongly recommended. The adhesive reaches approximately 90% of its strength after 24 hours and 100% after 72 hours. Waiting ensures that the edge of the spoiler will not lift during the first high-pressure wash.
My spoiler came raw/grey: what should I do?
A raw or primed version is intended to be painted in the color of your car by a body shop before installation, for a seamless look. If you prefer not to paint it, choose a Gloss Black or Carbon Effect finish instead, ready to stick on.
What if I still want to screw it on for extra security?
For most ABS spoilers, this is not necessary and will create permanent holes. Screwing is only justified for very large wings on stands subjected to high stress, or when the manufacturer explicitly provides dedicated mounting points.
The original adhesive is no longer sticking, what should I do?
If the adhesive installed at the factory has become dusty or lost its grip (for a part that has been stored for a long time), remove it and replace it with a new roll of 3M VHB double-sided adhesive of the correct width. You will then start with a perfect base.
What adhesive to use for a car spoiler: choosing the right double-sided adhesive

The question of adhesive for car spoilers arises whenever the part arrives without factory-applied tape, or when the original tape has aged in storage. Only one product family is suitable: 3M VHB acrylic foam double-sided adhesive. Everything else—cyanoacrylate glue, polyurethane mastic, silicone, tube-based neoprene—should be ruled out.
The reason lies in the physics of the assembly. A spoiler and painted sheet metal expand at different rates in the sun: between a hatch at 60°C in the middle of summer and the same hatch below freezing in January, the ABS part moves more than the bodywork. A rigid adhesive will crack under this stress; acrylic foam, on the other hand, absorbs it by deforming.
This is also why a rigid adhesive is never reversible: removing it will tear off the paint with it. Double-sided adhesive, however, can be cut with a thread and leaves the lacquer intact.
Thickness and width: the two numbers that matter
When choosing a double-sided spoiler tape, two dimensions matter. Thickness first: on a properly flat mounting area, a tape measuring 0.8 to 1 mm is sufficient. On a contoured hatch where the part does not touch everywhere, you need to go up to 1.1 or even 1.5 mm: the foam must fill the gap, otherwise only the high points will bond.
Then there is the width. It should be slightly narrower than the mounting area so that nothing protrudes once pressed: 12 mm for a thin lip, 19 mm for a standard trunk spoiler, 25 mm for a wide base. A tape that is too wide will ooze out the sides and be visible; too narrow, and it concentrates the stress on a tiny strip.
Adhesion primer: essential on certain plastics
On painted bodywork, the adhesive bonds on its own. On a raw polypropylene or TPO spoiler—so-called "low surface energy" plastics—it will not bond permanently. An adhesion primer in a pen or wipe, applied only to the plastic side, solves the problem.
How do you know if your part needs it? ABS and painted parts do not; raw polypropylene does. If in doubt, a test is enough: stick three centimeters of tape to a hidden area of the part, wait an hour, and pull. If the tape detaches cleanly from the plastic without leaving foam behind, you need a primer.
Replacing worn factory tape
A spoiler that has been stored for a long time sometimes arrives with dusty or hardened adhesive. Do not try to "revive" it: remove it completely, clean the spoiler's mounting area with isopropyl alcohol, then apply a new tape following the original outline exactly. Ten minutes of work that prevents it from coming loose in three months.
Choosing the tape and preparing the surface deserve a guide of their own: we explain them in detail in our 3M adhesive and surface preparation guide.
Adhesive-mounted spoilers


Mounting a wing on stands or a roof spoiler: what changes

Everything that preceded applies to a lip bonded flat to the edge of the trunk. Two families of parts fall outside this category and require a different approach: the car wing mounted on stands, and the roof spoiler mounted at the top of the hatch.
The wing on stands: the lever arm changes everything
A spoiler bonded flat to the trunk distributes its stress over its entire bonding length. A wing on stands does the opposite: the blade catches the air twenty or thirty centimeters above the trunk, and this stress comes down concentrated on two small bases. The bonded surface is much smaller, for a stress multiplied by the lever arm.
This is why, and not out of excessive caution, the mounting of a wing is most often done by screwing. When the manufacturer provides mounting plates, gaskets, and a drilling template, it is because they have calculated that bonding alone would not be enough: follow their instructions rather than this guide.
A common intermediate case in tuning: the short-stand wing, whose bases are over ten centimeters long. This one is bonded, provided you double the width of the tape under each stand and press it into place for a long time.
The roof spoiler: three specific constraints
On an estate, SUV, or hatchback, the spoiler is mounted at the top of the glass, in the extension of the roof. The installation remains adhesive, but three points change.
Water drainage. The top of the hatch is the line where rainwater passes. A spoiler bonded across this drainage path creates a dam, and the stagnant water eventually seeps under the tape. A part designed for your model incorporates this clearance; a universal part does not.
The rear wiper. Check the full range of the blade before bonding, with the engine running and not by hand: the blade rises higher when operating than in the resting position. A spoiler mounted two centimeters too low blocks the arm and puts the wiper motor under stress.
The third brake light. On many hatches, it is located precisely in the mounting area. Obscuring it, even partially, is a reason for a re-inspection at the technical inspection and a real risk in use. Dedicated roof spoilers provide a cutout or pass above it.
For these two families of parts, the template matters as much as the installation: see our spoiler dimensions guide before ordering.
Roof spoilers and wings


Universal spoiler or dedicated spoiler: compatibility, price and checks before purchase
The universal car spoiler is tempting: a single reference, a low price, and the impression that "it will fit just fine". In fact, a universal one is a virtually straight part, while a hatch is contoured in two directions at once.
Sticking a straight part on a double-contoured surface forces it. The tape holds as long as the adhesive is fresh, then the part works to regain its shape and peels off at the ends—usually during the first big cold snap. No surface preparation can make up for this shape defect.
The universal one still has a legitimate place: short, flexible parts mounted on a low-contoured area, or rubber lips that naturally follow the shape. For a rigid trunk spoiler, the part molded for your model remains the only reliable mounting.
The four checks that prevent a return
How much does a spoiler cost: the orders of magnitude
The prices below are taken from our catalog as of August 18, 2026 and are given as estimates: they change, the product page is authoritative. The Car Spoiler collection has 745 references as of this date.
An ABS trunk lip for a city car starts at around €50. A dedicated spoiler for a premium sedan or coupe is most often between €130 and €250. Beyond that, we enter the world of genuine carbon fiber and pedestal wings, where the price of a wing commonly exceeds €300 and reaches four figures on sports car parts.
The “cheap spoiler” is therefore judged less by the displayed price than by what it costs once installed. A thirty-euro universal one that peels off in three months costs more than a one-hundred-and-fifty-euro dedicated part that stays put.
Shipping costs and warranty: what you need to know before checking out
Our delivery grid in France can be summarized in three lines: shipping is free for baskets up to €14.99, costs €9.95 from €15 to €499.99, and €29.95 from €500. There is no threshold beyond which it becomes free again: a spoiler, whatever it may be, therefore falls into one of the last two brackets. Shipping is done by La Poste with insurance against loss, damage, and theft.
For the warranty, delivery times, and return procedures, please refer to our general terms and conditions of sale: these are authoritative, and we prefer to refer you there rather than announce a figure here that would commit you to nothing. Any doubt about the compatibility of a reference with your vehicle? Our sales contact answers on a case-by-case basis, with the registration certificate at hand.
Regarding the material itself, our carbon, fiberglass, and ABS comparison details what each family brings and what it costs.
Dedicated spoilers, no universal ones


Frequently asked questions about glue, wings, and compatibility
What glue should I use to reattach a spoiler that has come loose?
New 3M acrylic double-sided tape, never glue in a tube. Completely remove the old adhesive from both sides, degrease with isopropyl alcohol, then reapply as if it were a new installation. A rigid glue would hold for a few months before breaking.
What width of double-sided tape for a trunk spoiler?
19 mm covers the majority of trunk spoilers. Go down to 12 mm for a thin lip, up to 25 mm for a wide base. The tape must remain slightly narrower than the span of the part so as not to protrude once pressed.
Is an adhesion primer needed on a spoiler?
On a painted or ABS part, no. On raw polypropylene or TPO plastic, yes: these are low-energy surfaces on which acrylic does not bond durably without a primer.
Does a universal spoiler hold as well as a dedicated spoiler?
No, as soon as the mounting area is curved. A straight part constrained on a double curve works constantly and peels off at the ends. The universal one is only suitable for short and flexible parts, on an almost flat surface.
Can a pedestal wing be glued on without drilling?
Only if the bases are long, the blade low, and the part light. As soon as the manufacturer provides a drilling template and gaskets, it means they have calculated that gluing alone is not enough: follow their instructions.
How to install a roof spoiler without interfering with the wiper?
Turn the rear wiper motor on and identify its actual high travel, which exceeds the resting position. Glue above this limit. A spoiler installed too low blocks the arm and puts the motor under strain.
Can a spoiler hide the third brake light?
No. Hiding even partially the third brake light is a reason for a counter-inspection at the technical inspection. Dedicated roof spoilers provide a cutout or pass above the light.
How much does a trunk spoiler cost?
As of August 18, 2026, an ABS lip for a city car starts at around €50, a dedicated spoiler for a sedan or coupe is most often between €130 and €250, and carbon fiber or a pedestal wing commonly exceeds €300. These are estimates: the product page is authoritative.
Is shipping free on a spoiler?
No. Shipping is only free for baskets up to €14.99. From €15 to €499.99 it costs €9.95, and €29.95 from €500. No threshold makes it free beyond that.
How to know if a spoiler is compatible with my car?
Check four things: the chassis code (an F30 and a G20 share nothing), the exact bodywork (sedan, coupe, station wagon, Sportback), the model phase after restyling, and the delivered trim. The registration certificate gives the first three.
Can a spoiler be installed on a leased or LOA car?
Adhesive installation is reversible and leaves no trace if removed properly, unlike drilling. There remain the return conditions, which fall under your contract: it is the lessor to ask before gluing.
Does the double-sided tape resist high-pressure washing?
Yes, once the 72 hours of cohesion build-up have passed. The only reflex to keep is not to direct the lance very close and perpendicularly on the glued edge, the weak point of any adhesive assembly.
A spoiler that refuses to hold despite a careful installation almost always has an identifiable cause: we review them in our article on adhesives that do not hold.
Conclusion: a sporty look in less than an hour, without drilling
Installing an adhesive trunk spoiler is one of the most cost-effective and most rewarding modifications that can be done by oneself on one's car. Without drilling, without risk of rust and in a totally reversible way, you transform the rear of your vehicle in less than an hour. The secret lies in three words: degrease, heat, press — and a little patience during drying. Respect these principles and your spoiler will hold for years, with a look worthy of a factory finish.
Ready to take action? Discover our selection of spoilers and wings for all brands — BMW, Audi, Mercedes, Volkswagen, Ford and many others — and choose the part designed for your model. Any doubt about compatibility or trim? Contact us: we will guide you to the right reference on the first try, for a successful installation on the first attempt.
Recevez nos prochains guides en avant-première
Tutos pose, comparatifs aftermarket vs origine, sélection M Performance/AMG/RS, codes promos exclusifs.