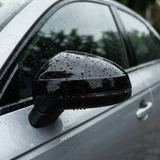
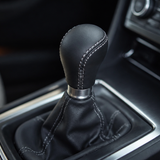
Maintaining carbon fiber and ABS tuning parts: the guide
The essentials in 6 points
- First, identify the material: genuine carbon fiber, carbon-effect ABS, or glossy black ABS cannot be cleaned in the same way, and cleaning carbon fiber has nothing to do with treating painted plastic.
- Gentle washing only: pH-neutral shampoo, two-bucket method, clean microfiber, never a dry cloth on a dusty surface, never a car wash brush.
- UV protection is the key: it prevents the carbon clear coat from yellowing, the most common and hardest-to-fix type of damage.
- Realistic budget: €25 to €60 per year for home maintenance, compared to €250 to €700 for a ceramic coating applied by a professional.
- A simple seasonal schedule is enough: decontamination in spring, enhanced protection before summer, salt removal in winter.
- Act quickly: a fresh micro-scratch can be corrected in ten minutes, but peeling clear coat requires a complete reconditioning.
You have invested in beautiful tuning parts — a spoiler, a carbon paddle shifter, mirror caps, or a splitter — and you want them to keep their original shine year after year. This is an excellent approach, because carbon fiber and ABS parts, as beautiful as they may be, are not indestructible. The sun, heat, harsh washing, and everyday micro-scratches can dull a clear coat, yellow a fiber, or mattify a beautiful glossy black finish. The good news is that with the right techniques — often simple and inexpensive — you can keep accessories looking like new, and even revive a part that has started to lose its luster.
The trap is thinking that you maintain a part made of genuine carbon the same way as a part made of carbon-effect ABS or glossy black ABS: these are three different materials, each with its own vulnerabilities and specific care requirements. Using the wrong product or technique can do more harm than good. In this comprehensive guide, we will learn how to identify your material, understand its enemies, master washing and protection, specifically maintain carbon and ABS, and finally restore a dull part. Clear diagrams will help you visualize each step for flawless maintenance.

Carbon, carbon effect, and ABS: correctly identifying your part

Before using any product, you need to know what you are dealing with. Three main families of materials are used for tuning accessories. The first is genuine carbon fiber: a weave of fibers embedded in resin and covered with a transparent clear coat that gives the part its depth and shine. It is the most premium and expensive material, and the one that makes a part lighter — not because the material is less dense, but because the laminate is much thinner: a carbon/epoxy composite weighs about 1.55 g/cm³, compared to 1.04 for ABS, so it weighs more for the same volume. Its weak point: the clear coat, which is sensitive to UV rays and can yellow or dull over time if not protected.
The second family is carbon-effect ABS: an ABS plastic part covered with a hydrographic film or print imitating the carbon weave, all under clear coat. Visually impressive and much more affordable, it is maintained like a standard painted and clear-coated surface, avoiding anything that could damage the decorative film. The third family is glossy black ABS (or painted in another color): a durable technical plastic, painted and clear-coated, which offers a superb "piano black" finish but mercilessly reveals micro-scratches and marks.
How can you tell? Genuine carbon features a perfectly uniform weave that is raised under the clear coat, and sounds solid when tapped. Weight, however, is not a reliable test: carbon/epoxy material is denser than ABS (about 1.55 compared to 1.04 g/cm³), and a carbon part only makes the car lighter because its laminate is thinner. Carbon effect shows a regular printed pattern that feels "flat" to the touch. Glossy black ABS is smooth and uniform. In fact, many of our accessories are offered in several finishes — ABS, carbon effect, or genuine carbon fiber — allowing you to choose according to your budget. The diagram below summarizes the characteristics and basic care of each material.
The enemies of your tuning parts

To protect properly, you need to know the threats. The first enemy, by far, is UV rays. The sun degrades clear coats and resins: on genuine carbon, an unprotected clear coat will eventually yellow and lose its transparency, leaving a milky haze. On carbon effect and ABS, UV rays dull the shine and can cause colors to fade. A car parked outside permanently is exposed to this damage every day.
The second enemy is heat, often combined with UV rays: a part exposed to direct sunlight can reach high temperatures that fatigue the clear coat, soften certain mounting adhesives, and accelerate aging. The third enemy includes harsh chemicals: overly alkaline cleaners, solvents, powerful degreasers, or car wash brushes with harsh chemicals can damage the clear coat and decorative films. The fourth are micro-scratches: dry washing, a dirty sponge, an abrasive cloth, or a hasty wipe creates these fine scratches that especially dull glossy black finishes.
Finally, the fifth enemy is the most insidious: neglect. A part that is never protected, washed improperly, and left exposed without wax for seasons will age much faster than a part regularly maintained with simple techniques. Understanding these five threats is the first step to knowing what to protect your accessories from. The animated diagram below illustrates the cumulative effect of these damages on an unprotected part.

Washing: correct techniques and mistakes to avoid

Washing is the foundation of everything, and it is also where most unintentional damage occurs. Rule number one: never wash dry. Rubbing a dusty part without water guarantees micro-scratches, as dust particles act like sandpaper. Always start by rinsing thoroughly with clean water to remove particles. Rule number two: use a pH-neutral car shampoo, which is gentle on clear coats, rather than a household degreaser or harsh alkaline product.
Rule number three: prefer the two-bucket method (one for shampoo, one for rinsing the mitt) and a clean microfiber mitt rather than an old sponge that traps sand. Wash from top to bottom, without applying pressure, using straight rather than circular motions (circular scratches are more visible on glossy black). Rule number four: for drying, use a thick, clean microfiber cloth, blotting or gently gliding it, never rubbing hard. A microfiber cloth dropped on the ground should be set aside: a single grain can scratch.
Absolutely avoid: car wash brushes (brushes loaded with abrasive dirt), high-pressure jets held too close to bonded parts (risk of peeling), paper towels or rough fabrics, and any product not designed for automotive use. Regarding parts attached with adhesive (spoilers, trim, mirror caps), keep the jet away from the edges to prevent water from seeping under the glue; our tips on 3M adhesive and surface preparation remind you of the importance of a proper bond to withstand repeated washing.
Protecting the clear coat and fiber: waxes, sealants, ceramic

Washing is good; protecting is essential. A protective layer forms a barrier against UV rays, water, and dirt, and makes subsequent washes easier. There are three main types of protection, in order of increasing durability. Wax (carnauba or synthetic) provides a warm, deep shine, particularly flattering on carbon and glossy black; it needs to be reapplied every one to three months. Easy to apply, it is the ideal entry-level protection.
A sealant (synthetic sealant) lasts longer (several months), with a very clean finish and good chemical resistance. It is perfect for those who want to space out applications. Finally, ceramic protection (coating) is the top of the range: a hard, hydrophobic layer that provides long-lasting protection (from one to several years depending on the product), resists UV rays, and enhances the depth of the carbon. More demanding to apply (rigorous preparation, sometimes reserved for professionals), it is the best long-term investment for valuable parts.
Regardless of the product, two principles: always apply it to a clean, dry, and cool surface (never in direct sunlight on a hot part), and opt for a protection that includes a UV filter, especially for genuine carbon. For the most exposed parts, do not hesitate to layer: a sealant or ceramic coating as a base, and a finishing wax for shine. The diagram below illustrates the role of each protective layer.

Specifically maintaining genuine carbon
Genuine carbon deserves special attention, because its value and beauty depend entirely on the condition of its clear coat. The number one threat is UV yellowing: over time, an unprotected clear coat turns yellow and veils the weave. The solution is simple but essential: apply a protection with a UV filter (wax, sealant, or preferably ceramic) and reapply it regularly. A well-protected carbon part retains its transparency and depth for years.
For regular washing, carbon is treated like a clear-coated car body: pH-neutral shampoo, microfiber mitt, gentle drying. Absolutely avoid harsh abrasive polishes on a thin layer of carbon clear coat: you can break through the clear coat and reach the fiber, causing damage that is difficult to repair. If the clear coat has slight micro-scratches, a gentle polish applied by hand or with a machine at low speed, sparingly, can revive the shine — but always test it on a small area first.
Also keep heat in mind: a carbon paddle shifter or interior element exposed to the sun behind a windshield gets extremely hot. A sunshade and parking in the shade significantly extend the life of the clear coat. Finally, treat carbon with respect every day: avoid impacts and the rubbing of rings or jewelry on the paddle shifters, and never place hard objects on a carbon part. A little care preserves an exceptional material.
Maintaining painted ABS (glossy black and carbon effect)
Glossy black ABS — the famous "piano black" — is beautiful but merciless: it reveals the slightest micro-scratch, fingerprint, or speck of dust. Its maintenance relies on absolute gentleness: washing with water and mild shampoo, drying only with a clean microfiber cloth, and never using a dry cloth on a dusty surface. To remove marks and restore depth, a glaze (pre-wax polish) followed by a wax works wonders on glossy black, masking fine scratches and reviving the shine.
Carbon-effect ABS is treated similarly, with extra vigilance: the decorative film that imitates the weave is sensitive to abrasives and solvents. Avoid overly aggressive polishes and harsh cleaners that could mark or discolor the pattern. A gentle wash, followed by wax or sealant protection, is enough to maintain the brilliant carbon appearance. Also avoid scratching the surface with a fingernail or tool: the film, although clear-coated, remains more fragile than a thick layer of real paint.
For both finishes, one detail makes all the difference: drying. Letting it air dry creates water spots, especially visible on glossy black. Always dry with a clean microfiber cloth, or use demineralized water for the final rinse if your water is very hard. These simple steps maintain a flawless finish, whether it is a spoiler, mirror cap, or paddle shifter. And if a part has nevertheless lost its luster, the next section explains how to revive it.
Reviving a dull or micro-scratched part
A part that has lost its luster is not necessarily beyond repair. Most dullness and light micro-scratches can be corrected through a methodical restoration. Step 1: washing and decontamination. Wash carefully, then optionally use a clay bar to remove embedded contaminants that prevent the clear coat from shining. Step 2: assess the condition. Superficial micro-scratches that disappear when the surface is wet are correctable; deep scratches that catch a fingernail generally are not without advanced intervention.
Step 3: gentle polishing. On glossy black ABS or carbon clear coat in good condition, a lightly abrasive polish applied by hand with a foam pad, using crossed motions and without overheating, reduces micro-scratches and restores shine. Go gradually: you can always apply more, but you can never go back if you have polished too much. Caution is necessary on genuine carbon due to the thinness of the clear coat. Step 4: clean up polish residue with a clean microfiber cloth. Step 5: immediate protection with wax, sealant, or ceramic coating to seal the work and prevent further damage.
The animated diagram below summarizes this five-step restoration protocol. If the part is severely damaged (pierced clear coat, exposed fiber, deep scratches), it is better to consider replacement or seek the advice of a professional detailer. But in the vast majority of cases, a good home restoration gives your accessories a shine very close to new, at a negligible cost compared to buying a replacement.

Storage and seasonal precautions
Maintenance doesn't stop once a part has been installed: if you remove an accessory (for winter, a replacement, or storage), a few precautions can prevent unpleasant surprises. Store parts flat or hanging in a dry, temperate place away from light, never stacked under a load that could warp or scratch them. Wrap them in a soft fabric (microfiber, foam) rather than plastic, which can mark the clear coat or trap moisture.
Adapt your maintenance as the seasons change. In summer, apply UV protection more often and favor the shade: this is when the clear coat suffers most. In winter, beware of road salt, which is highly corrosive and builds up on lower parts (splitters, bumper lips): rinse regularly with clean water. Cold weather also weakens mounting adhesives, so avoid using powerful jets near bonded edges in freezing conditions.
Finally, establish a simple routine: regular gentle washing, reapplying protection according to the product you've chosen, and periodically checking the fasteners and edges. This small amount of care makes all the difference between accessories that age prematurely and parts that stay looking great for years. If you ever need to remove a bonded part without damaging the paint, our guide how to remove an adhesive accessory without damaging the paint will guide you step by step.
FAQ: your questions about caring for tuning parts
How can I tell whether my part is real carbon fiber or a carbon-look finish? Real carbon fiber has a regular raised weave beneath the clear coat. A carbon-look finish has a printed pattern that feels “flat” to the touch. Don't judge by weight: for the same volume, carbon/epoxy (1.55 g/cm³) is denser than ABS (1.04), and it's the thinness of the laminate that makes the part lighter. If in doubt, the product description specifies the finish (ABS, carbon-look, or genuine carbon fiber).
My carbon clear coat has yellowed. Can I restore it? A slight haze can sometimes be reduced with a gentle polish and UV protection, but deep yellowing of the clear coat is difficult to reverse. The best approach is still prevention: protect it from the outset with a UV-filtering product.
What product should I use on easily scratched gloss black? Wash very gently with microfiber, then apply a glaze followed by a wax to mask fine scratches and restore depth. Avoid wiping a dusty surface with a dry cloth, which is the main cause of scratches on piano black finishes.
Can I take my car through an automatic car wash with my tuning parts installed? This is not recommended. Car-wash brushes trap abrasive dirt that scratches clear coats and can catch on protruding or bonded parts. Opt for a gentle, methodical hand wash instead.
How often should I reapply protection? It depends on the product: wax every 1 to 3 months, a sealant every few months, and a ceramic coating once or several times a year, depending on the formula. A car parked outdoors needs more frequent reapplication.
Is ceramic protection worth the investment? For valuable genuine carbon fiber parts or a vehicle exposed to the elements, yes: it provides long-lasting UV protection and makes maintenance easier. For more straightforward use, a good wax or sealant already provides excellent protection at a lower cost.
Detailed budget for carbon fiber and ABS maintenance
Many car owners put off maintaining their accessories because they expect it to cost a lot. The reality is more reassuring: protecting an ABS spoiler, mirror caps, or carbon steering wheel paddle shifters costs less than a year's worth of fuel for a full tank. What changes is the level of care you choose. An owner who parks their car in a garage and hand-washes it every two weeks doesn't need the same arsenal as a driver whose car sits in full sun all year. The table below outlines three realistic levels, with typical price ranges in France for consumer-grade car detailing products.
| Level | What you buy | Initial budget | Annual cost | Best for |
|---|---|---|---|---|
| Entry-level | pH-neutral shampoo, 3 to 4 microfiber cloths, liquid or paste wax, a bucket with a grit guard | €40 to €70 | €25 to €40 | Car parked under cover, painted ABS parts, family use |
| Mid-range | The previous kit plus a touchless pre-wash, a decontamination clay bar, a gentle polish, a polymer sealant, and a quick detailer | €110 to €180 | €45 to €70 | Regular outdoor parking, carbon-look parts, conscientious owner |
| DIY ceramic protection | Consumer-grade ceramic coating kit with prep degreaser, applicators, and dedicated maintenance products | €70 to €150 per kit | €30 to €50 (compatible shampoo) | Methodical DIY enthusiast, highly exposed genuine carbon fiber parts |
| Professional ceramic coating | Preparation, light correction, and application at a detailing shop, with a warranty that varies by formula | €250 to €700 (entire vehicle) | Annual maintenance recommended, often €60 to €120 | Premium vehicle, expensive carbon fiber parts, peace of mind |
| Paint protection film (PPF) | Applying polyurethane film to parts most exposed to stone chips | €80 to €250 per part, depending on its surface area | Almost none, just gentle washing | Highly exposed splitters, bumper lips, side skirts |
The main takeaway from this table is that the most cost-effective option is never the most expensive. A simple UV-protective wax costing fifteen euros, applied three times a year, protects a carbon fiber clear coat better than a premium treatment applied once and then completely forgotten. Consistency beats a one-off investment, almost every time. And if your budget is tight, focus on the parts that are truly exposed: the trunk spoiler, mirror caps, and front splitter get far more sun and road debris than steering wheel paddle shifters protected inside the cabin.
Key takeaway
Proper home maintenance costs about as much as two visits to an automatic car wash per year, while protecting your parts far more effectively. Buy fewer products, but choose quality ones—and above all, actually use them.
▸ Our recommended accessories

Annual maintenance calendar, season by season
The best way to keep a part from deteriorating is to schedule its maintenance around the seasons rather than relying on good intentions. Each time of year brings its own hazards: road salt in winter, pollen and tree sap in spring, intense ultraviolet radiation in summer, and wet leaves and acid rain in fall. Here's a simple calendar you can follow without spending more than a few hours a year in total.
| Time of year | Main hazard | Tasks to schedule | Estimated time |
|---|---|---|---|
| March – April | Salt residue, embedded winter grime, pollen | Thorough two-bucket wash, clay-bar decontamination on smooth parts, inspect adhesives and spoiler edges | 2 hours |
| May – June | Increasing UV radiation, tree sap, insects | Apply the main protection for the year: sealant or ceramic coating on carbon fiber, UV-protective wax on ABS | 1 hour 30 minutes |
| July – August | Peak UV, heat, corrosive bird droppings | Frequent gentle washes, immediate removal of dirt, top up with quick detailer, park in the shade whenever possible | 30 minutes every 15 days |
| September – October | Wet leaves, first heavy rains | Full wash, visually inspect the clear coat, light polish if there are fine scratches, apply a second coat of protection before winter | 2 hours |
| November – February | Salt, stone chips, persistent moisture, frost | Rinse thoroughly with clean water after driving on salted roads, dry carefully, never scrape a frosted part | 15 minutes per rinse |
This calendar isn't set in stone. If you don't drive much, simply postpone the major tasks. If your car sits outdoors all year, add an intermediate coat of protection in July. The key idea remains the same: never let a full season go by without closely checking the condition of your accessories' clear coats. A two-minute visual inspection is better than a two-hour restoration.
Real-world lifespan of carbon fiber and ABS parts by exposure
One question comes up again and again: how long does a part really last? The answer depends far less on the brand than on parking conditions and how consistently it's protected. The same genuine carbon fiber mirror cap can stay pristine for eight years under a carport, or start yellowing by its third season if it spends all day facing south with no protection. The following table gives approximate figures observed for reasonably good-quality parts, for reference only.
| Material | Garage or covered parking | Outdoors with regular protection | Outdoors without protection | First sign of wear |
|---|---|---|---|---|
| Genuine clear-coated carbon fiber | 8 to 12 years with no visible deterioration | 5 to 8 years | 2 to 4 years | Yellowing haze on horizontal surfaces |
| Carbon-look ABS (hydro-dipped film) | 6 to 10 years | 4 to 7 years | 2 to 3 years | Loss of pattern contrast, localized dullness |
| Gloss black ABS (piano black) | 7 to 10 years | 4 to 6 years | 2 to 4 years | Spiderweb of fine scratches visible in sunlight |
| Body-color painted ABS | 8 years or more | 5 to 8 years | 3 to 5 years | Slight color mismatch with the bodywork |
| Double-sided mounting adhesive | Very long-lasting | 5 to 8 years | 3 to 6 years depending on hot-cold cycles | Slight movement or whistling at high speed |
Two factors carry much more weight than all the others. The first is the parking orientation: a car parked to expose the hood and spoiler to the south ages significantly faster than a car facing north. The second is the surface temperature, because hot clear coat is soft clear coat, and therefore more sensitive to abrasion during washing. Washing a piece that is burning hot in the noon sun concentrates the equivalent of several months of micro-wear into a single session.
Diagnosis: recognize the type of degradation and address it
Before taking out a product, you need to know what you are treating. Four types of degradation account for the vast majority of cases encountered on tuning parts, and each requires a different response. Misdiagnosing means, at best, wasting time, and at worst, making the defect worse. Get into the habit of observing the part under raking light, ideally with an inspection lamp or the late afternoon sun: that is when everything is revealed.
UV yellowing
It manifests as a uniform golden or amber tint, more pronounced on horizontal surfaces and in areas most exposed to the sun. Run a damp microfiber cloth over it: if the color does not change and the shaded area of the part remains lighter, it is indeed clear coat yellowing. The solution depends on the depth. A nascent haze often subsides with a mild polish applied without excess, followed immediately by a UV-filtering protection. On the other hand, deep yellowing cannot be corrected: the pigment has migrated into the thickness of the clear coat, and only professional recoating restores its original appearance. It goes without saying that prevention remains the only truly winning strategy here.
Micro-scratches
These are the fine circular or spiderweb scratches that appear in the sun on glossy black surfaces. They cannot be felt with a fingernail and almost always come from dry wiping, a dust-laden microfiber, or a trip through an automatic car wash. The right solution is to work a finishing polish on a soft pad, with very little pressure, using crisscrossing passes. A glaze applied afterward optically fills in what remains, and a wax seals it all. On a carbon-effect part, be even lighter: the decorative film is only a few microns thick, and over-polishing can irreversibly pierce it.
White or milky haze
A whitish appearance, often localized along the seams, in the grooves, or around the mountings, generally indicates unrinsed product residue, limescale deposits from hard water, or moisture trapped under weakened clear coat. Start with the simplest: a gentle cleaning with a slightly acidic solution designed for water spots, then a rinse with demineralized water and complete drying. If the haze persists after complete drying, it is clear coat microporosity, and a light polish followed by a protection is then the only reasonable option before considering a refurbishment.
Clear coat lifting or peeling
This is the most severe degradation. It appears as small areas where the clear coat lifts, cracks, or reveals the raw weave underneath. No maintenance product can fix this, and above all, you should never sand or polish a peeling area: you would only enlarge the patch. The only valid solution is to have the clear coat redone by a paint professional, or to replace the part. Also be careful of water seeping under lifted clear coat: on genuine carbon, moisture can eventually attack the resin and slightly deform the part.
Key takeaways
Three of the four degradations can be corrected at home if you intervene early. The fourth, peeling clear coat, can never be fixed with a maintenance product. Diagnosis under raking light is therefore the most cost-effective step in all your maintenance.
Comparison of protection solutions: wax, sealant, film, ceramic
Once the part is clean and healthy, the most strategic question remains: what protection to apply over it. Four families dominate the market, and they are not really opposed; they complement each other. A ceramic car treatment does not have the same role as a polyurethane film, and a wax remains unbeatable in terms of simplicity-to-result ratio. Here is how they compare on the criteria that matter for tuning parts.
| Solution | Longevity | UV Filtering | Mechanical protection | Application difficulty | Verdict |
|---|---|---|---|---|---|
| Wax (natural or synthetic) | 1 to 3 months | Good | Low | Very easy | The best choice for beginners and for the depth of the glossy black |
| Polymer sealant | 4 to 8 months | Good | Low to medium | Easy | The best compromise between duration, price, and simplicity for carbon-effect ABS |
| Ceramic treatment | 1 to 5 years depending on the formula | Excellent | Medium (light anti-micro-scratch) | Demanding, preparation mandatory | The most relevant for genuine carbon that is highly exposed |
| PPF protection film | 5 to 10 years | Very good depending on the film | Excellent, absorbs gravel | Professional installation recommended | Unbeatable on splitters and bumper blades |
| Quick detailer | A few days | Marginal | None | Immediate | A top-up complement, never a standalone protection |
The smartest combination for an everyday tuned vehicle is often hybrid: a PPF film on the elements that take projections, a sealant or ceramic on the carbon parts exposed to the sun, and a wax two to three times a year on the rest to maintain the shine. There is no need to ceramic coat steering wheel paddles that never see rain, and no need to wax a splitter that gravel hammers every week.
What users report over time
The feedback we receive overlaps a lot, and it is often more instructive than any technical sheet. Without surprise, the most methodical owners are the ones who complain the least, but a few constants deserve to be shared.
The most frequent comment concerns parking. Several drivers who changed their parking spot, moving from a street in full sun to a shared garage, describe a visible difference from the first year in the shine of their rearview mirror caps. Conversely, those who leave their vehicle outside all year and apply no protection often report a perceptible loss of shine from the second summer season, especially in the south of France.
Second constant: the disappointment associated with automatic washing. Many report having seen very clear micro-scratches appear after a few passes through the brushes, especially on glossy black surfaces. Some also report slightly detached spoilers on an edge after a high-pressure pass that was too close. This type of feedback comes back regularly enough for us to take it seriously.
Third point, more encouraging: the satisfaction after a first mild polish session. Several users thought they had to replace a dull part and realized that one hour of careful work was enough to restore an appearance very close to new. This is particularly true for glossy black ABS, whose dull appearance comes much more often from a buildup of micro-scratches than from a real alteration of the material. Finally, several reports highlight that switching from wax to polymer sealant simply saved them time, with no visible loss of shine, which perfectly matches the comparison table above.
The ten mistakes that damage tuning parts the most
Most of the observed damage does not come from a lack of maintenance, but from poorly done maintenance. Here are the most common mistakes, ranked from the most destructive to the most insidious.
1. Wiping a dry and dusty part. This is the number one cause of micro-scratches. Every dust grain becomes an abrasive that you walk across the clear coat. Always rinse abundantly before any contact.
2. Washing in full sun on a burning surface. The product dries before rinsing, leaving mineral halos, and the clear coat softened by the heat takes the friction much worse.
3. Using a household cleaner or garage degreaser. These highly alkaline formulas attack clear coats and permanently dull ABS. Stick to neutral pH car shampoos.
4. Using a pressure washer too close to glued edges. A concentrated jet a few centimeters from double-sided adhesive can gradually peel it off. Keep about thirty centimeters and avoid attacking an edge head-on.
5. Reusing a microfiber that fell on the ground. It has picked up invisible gravel that will deeply scratch the part. A microfiber on the floor is a microfiber to wash, without exception.
6. Polishing a carbon-effect part too hard. The decorative film is only a few dozen microns under the clear coat. An aggressive polish or poorly controlled machine can pierce it and make the bare plastic appear, an irreversible damage.
7. Applying a protection on a non-degreased surface. Ceramics and sealants only adhere properly to a perfectly clean substrate. Skipping the degreasing step means seeing the protection disappear in a few weeks.
8. Scraping frost off a carbon part. A scraper on frozen clear coat leaves clear and permanent scratches. Let the defrosting happen with ventilation or with warm, never boiling, water.
9. Neglecting the back of the parts and the grooves. Moisture and residue stagnate in the corners, promoting white haze and corrosion of the metal mountings. A soft brush solves the problem in two minutes.
10. Waiting for an aggressive stain to go away on its own. Bird droppings, linden sap, crushed insects: these substances are acidic and etch the clear coat in a few days of sun exposure. Treat them the same day with a damp cloth and a lot of patience, never by rubbing dry.
Key takeaways
Nine of these ten mistakes are solved with two reflexes: rinse before touching, and never work on a hot or dry surface. If you were to remember only one thing from this entire guide, it would be that.
Additional frequently asked questions
How to clean carbon fiber without risking damage to the clear coat? First rinse with clear water to remove abrasive particles, then wash with a neutral pH shampoo and a clean microfiber, using straight strokes and without pressing. Rinse again, then dry with a microfiber dedicated to drying or a blower. That's it: carbon does not need an exotic product, it needs gentleness and cleanliness.
Can a steam cleaner be used on ABS parts? This is not recommended on glued parts. Steam easily rises above a hundred degrees and softens double-sided adhesives as well as clear coats. If you insist on it for cleaning grooves, keep it very brief, at a distance, and never on a mounting edge.
Can a yellowed carbon clear coat become completely transparent again? Rarely, and never when the yellowing is deeply established. A superficial haze from the first year subsides with a mild polish, but beyond that, the remedy is recoating. This explains why the UV protection applied at purchase is the most cost-effective step of the entire lifespan of the part.
Should a new part be protected right out of the box? Yes, and it is the best time. The surface is virgin, without contamination or micro-scratches, so the protection adheres perfectly and you start from an optimal state. A simple degreasing with diluted isopropyl alcohol, then the application of the sealant or wax, is enough.
Does car ceramic treatment really protect against scratches? It limits washing micro-scratches thanks to its hardness and slipperiness, but it stops neither gravel nor a key. For real mechanical protection, only a polyurethane film does the job. Consider ceramic primarily as a chemical and UV barrier.
Can a wax be applied over a ceramic? Yes, without any problem. It does not provide additional durability but temporarily enhances the depth of the black, which many appreciate on carbon-effect parts. Simply use a compatible wax and do not overdo it, a thin layer is always enough.
How to maintain carbon steering wheel paddles inside the cabin? They do not experience rain or gravel, but they receive finger oils and sometimes a lot of sun through the windshield. A weekly pass with a slightly damp microfiber, then a non-greasy interior product once a month, is more than enough. If you are considering replacing them or installing them, our tutorial for changing your steering wheel paddles details the entire procedure.
My spoiler whistles slightly on the highway, is it a maintenance problem? No, it is rather a mechanical signal. Whistling often indicates a joint that has become loose or an adhesive that is starting to fatigue on an edge. Inspect the glue line, clean it, and check its hold. Our guide on how to attach a car spoiler covers the best practices for gluing and surface preparation.
Does demineralized water really make a difference? On very hard tap water, yes, a significant one. The white drying spots come from dissolved minerals, and a final rinse with demineralized water removes them at the root. It is a negligible investment for an immediately visible result on black surfaces.
How to tell if my carbon effect is a hydrographic film or a print? Look at the pattern from a very shallow angle: a hydrographic film perfectly follows the curves of the part with slight distortions in the corners, while a print remains flat and regular. Our comparison of genuine carbon versus imitation carbon explains in detail the differences in manufacturing and aging.
Are products for exterior plastics suitable for my clear-coated parts? No. Plastic renovators are designed for raw, unpainted plastics and leave a greasy film that attracts dust on clear coat. On a clear-coated part, use classic car body products: wax, sealant, polish, quick detailer.
How often should a gloss black part be polished? As infrequently as possible. Each polishing removes a tiny layer of clear coat, so a maximum of once or twice a year, and only if micro-scratches become bothersome. Proper preventive maintenance should allow you to space out polishing by several years.
What should I do if my mirror caps have been hit by a stone chip? Clean the area, dry it, then immediately protect the impact to prevent water from seeping under the clear coat. A small clear touch-up pen limits the damage while waiting for a touch-up. For a replacement, browse our collection of mirror caps, available in several finishes.
Is a waterless wash acceptable on carbon fiber? Only on a very clean part, with plenty of product and a microfiber cloth changed frequently. On a truly dirty part, a waterless wash amounts to rubbing the dirt against the clear coat, and the result is predictable.
Want to refresh or complete your accessories?
Discover our car spoilers, our paddle shifters and our mirror caps, offered in ABS, carbon effect or genuine carbon fiber depending on your preferences and budget.
Forged carbon: the marbled pattern that is not maintained quite like a weave

Forged carbon — forged carbon in English catalogs — is not a fabric but a mass of short fibers immersed in resin, shaped by compression molding in a heated mold. It is therefore neither a weave nor an injected part: it is the pressure that fills the mold, and it is what gives this marbled, random pattern, never the same twice.
This origin explains everything else. A woven laminate displays a regular twill that the eye follows; forged carbon displays random patches of fibers, and a slight haze is less noticeable on it than on a weave. In return, a scratch becomes almost impossible to visually match, since there is no reference pattern to recreate.
Weight is not the argument. At the same volume, a carbon/epoxy composite weighs about 1.55 g/cm³ compared to 1.04 for ABS: the material is denser, and a carbon part only lightens the car because its laminate is significantly thinner. Forged carbon, which often requires a more generous material thickness than woven carbon to hold its shape, reduces this gain even further — you buy it for the look, not for the scale.
Woven carbon and forged carbon in everyday use
- Regular pattern, recognizable by the texture under the clear coat
- Often thin clear coat: polish by hand, sparingly
- Scratch can be matched as long as the clear coat is not pierced
- Touch-up possible: the pattern matches
- Random marbled pattern, no matching possible
- Generally thicker clear coat, more tolerant of polishing
- Exposed fiber = part to be replaced, not touched up
- Sensitive to UV like any epoxy resin composite
For routine maintenance, apply exactly the same protocol as woven parts: wash with a neutral pH shampoo, dry with a microfiber cloth, and apply a UV-filtering sealant several times a year. Epoxy resin yellows under ultraviolet light regardless of how the fibers were arranged, and it is always the clear coat that fails first.
Two nuances specific to forged carbon deserve a closer look. Its clear coat, often thicker, withstands a finishing polish better than a thin twill — which does not preclude testing on a discreet area. And its irregular texture retains products more: rinse for longer, under penalty of leaving white streaks in the hollows of the marbling.
Finally, beware of the confusion perpetuated by shop terminology: "forged carbon covering" refers to a printed film that imitates the marbled look, not a composite part. The difference is felt in the touch and the edge of the part, exactly like between real carbon and carbon effect; our comparison of carbon, fiberglass, or ABS spoilers details what each material actually costs in use.
Order of magnitude noted in our catalog on August 18, 2026, for reference and not as a guaranteed price: a carbon paddle shifter is between €79.00 and €290.00, a genuine carbon fiber mirror cap between €60.00 and €249.00, a carbon spoiler around €399.00, and a competition wing can exceed €1,299.00. Prices change: the product page is authoritative.
Carbon parts to maintain with these steps


Carbon covering film: a vinyl is not maintained like a clear coat

Carbon covering film is a printed adhesive vinyl, sometimes embossed to imitate twill, applied over an original part. There is no fiber, resin, or factory clear coat underneath: what you are maintaining is a sheet of plastic a few dozen microns thick glued to a substrate.
First consequence: anything abrasive is forbidden. A polish, even a mild one, wears down the printed layer and makes the pattern turn white in a few passes; on a matte-finish car carbon film, a single buffing session is enough to create permanent shiny areas.
Second consequence: the edges are the weak point. The glue ages first where the film ends, and a high-pressure jet aimed diagonally at an edge lifts the vinyl in a second. Always rinse flat, never in the direction that opens the edge.
Maintaining a carbon covering film
- Neutral pH shampoo only, never strong degreasers
- Zero polish, zero clay decontamination, zero brushes
- High pressure from more than 40 cm away, never diagonally on an edge
- Vinyl-compatible sealant, or dedicated covering spray
- Acidic stains treated the same day, without dry rubbing
- Matte finish: product without wax or polishing agents
The useful lifespan of a quality vinyl is measured in years, not decades, and it depends mainly on exposure: parking full south shortens everything. A film that starts to shrink at the corners cannot be fixed — it must be replaced, before the glue bakes onto the original paint.
On interior parts, the logic is reversed: no rain or stone chips, but sebum, UV rays filtered by the windshield, and permanent friction. Our guide on carbon dashboard inserts details what distinguishes a filmed insert from a composite insert, and how to clean each without dulling it.
One last word on the choice of finish, because it conditions maintenance more than the material itself: gloss forgives water marks but reveals micro-scratches, matte does the opposite and forbids any correction. Our comparison of matte, gloss, or carbon: which finish to choose sets out the reasoning once and for all.
Repair rather than replace: chip, crack, and pierced clear coat
Reviving a dull part and repairing damaged carbon fiber are two different trades. As long as the defect remains in the clear coat, it is cosmetic; as soon as the fiber is affected or the laminate delaminates, we enter structural repair, and the question is no longer appearance but the part's integrity.
The test is done with a fingernail and raking light. A mark that does not catch the nail is a clear coat micro-scratch; a cut that catches and reveals a lighter streak has pierced the clear coat; diffuse whitening around an impact signals sub-surface delamination, invisible but very real.
Treating a clear coat chip on a carbon part
- Clean and degreaseComplete wash then isopropyl alcohol, the area must be perfectly bare
- OutlineMasking tape around the chip to avoid working the healthy surface
- Sand with water very graduallyFine abrasive, with water, without ever reaching the weave
- Reapply clear coatLow-shrink clear coat, in thin layers, complete drying between each
- Level then polishVery fine leveling sanding, polish, then UV protection
Sanding carbon clear coat is the step where everything is decided, because the available thickness is low and the point of no return is invisible: the day the weave appears, no polish will bring it back. Work with water, with a fine abrasive and a block, checking the area every few passes rather than at the end.
A crack, on the other hand, is not sanded. On a structural part — bumper blade, fender extension, downforce-loaded wing — a cosmetic repair masks the defect without restoring strength, and the crack reappears under vibration. The laminate is repaired by removing the damaged material and re-stacking fabric and resin, which falls under the composite workshop.
On painted ABS, the calculation is different: the material is glued back and filled well, but the gloss black finish is difficult to match, and a paint touch-up on a small part often costs more than the part itself. Carbon and wide body fender flares illustrate this threshold well: the larger the visible surface, the more improbable the invisible repair becomes.
The decision rule holds in one sentence: we repair what remains in the clear coat, we replace what touches the fiber or the mounting. For a borderline case — expensive part, deep damage, doubt about integrity — a composite workshop quote and a conversation with our customer service are better than a sanding that condemns the part.
When the repair no longer makes sense: replace the part


Twelve questions about forged carbon, covering, and repair
These twelve questions complete the previous FAQs, which focused on washing and protection. They address the three topics the article did not cover: forged carbon, covering film, and the line between repairing and replacing.
Is forged carbon stronger than woven carbon?
Not systematically. The short fibers of forged carbon are randomly oriented, which gives a homogeneous behavior in all directions, where a woven fabric can be much more rigid in the axis of the fibers. For an aesthetic bodywork part, the difference is not seen in use; it is seen in repair, impossible to match on forged carbon.
How to recognize real forged carbon from a film that imitates it?
The forged carbon covering film repeats its pattern at regular intervals, while a compression-molded part never repeats. Also look for a film edge on a ridge or in a tight corner: a vinyl ends somewhere, a varnished laminate does not.
Is a carbon part really lighter than an ABS part?
At the same volume, no: the carbon/epoxy composite weighs about 1.55 g/cm³ compared to 1.04 for ABS, so it is denser. The mass gain comes from the thickness, a carbon laminate being significantly thinner than a molded ABS part for comparable rigidity.
Can you polish a carbon covering film?
No. The pattern is printed in a layer of a few microns: a polish, even a finishing one, wears it down and makes it turn white, without the possibility of going back. On vinyl, we wash, we protect with a compatible product, and that's it.
Is the high-pressure washer forbidden on a filmed or glued part?
It is not forbidden, it is to be handled differently: perpendicular jet, at a good distance, never aimed diagonally on a film edge or on the glue line of a spoiler. It is the angle that peels it, not the pressure alone.
From when does a scratch on carbon become irreparable?
When it pierces the clear coat. As long as the nail does not catch, a finishing polish is enough; as soon as a lighter streak appears at the bottom of the mark, the clear coat is pierced and it must be refilled before any protection, under penalty of letting moisture win the resin.
Can you sand carbon clear coat yourself?
Yes, with water, with a very fine abrasive and a block, on a masked area and checking constantly. The risk is not to sand badly, it is to sand one pass too many: the day the weave appears, the part is lost aesthetically.
Does a crack on a carbon bumper blade get repaired?
A structural crack is not filled on the surface: the repair consists of removing the damaged material and re-stacking fabric and resin, which falls under a composite workshop. A simple mastic masks the defect but does not restore strength, and the crack reappears under vibration.
Does forged carbon yellow too?
Yes, for the same reason as woven carbon: it is the resin and clear coat that react to ultraviolet rays, not the fiber. Regular UV protection is therefore just as useful on forged carbon, despite its more forgiving appearance when it comes to minor imperfections.
How long does a carbon-look vinyl wrap last on an exterior part?
It lasts for years and depends mainly on exposure and the quality of the vinyl. The sign of the end of its lifespan is not the color, but the behavior of the edges: as soon as the film begins to shrink back from a corner, it should be removed before the adhesive hardens on the surface.
Should matte parts and glossy parts be protected differently?
Yes. On a matte finish, any product containing wax or a glazing agent will create irregular satin patches: a specific matte sealant should be used instead. For a glossy finish, the range of options is much wider, including wax, polymer or ceramic sealants, depending on your budget.
Where can I have a part inspected if I have doubts about it before working on it?
If you are unsure about the material, the product page indicates the exact finish, and our customer service team can confirm it using the part number. If you are unsure about its durability after an impact, the opinion of a composite workshop remains the only reliable answer: we cannot assess a mounted part remotely.
Conclusion: long-lasting, brilliant accessories
Caring for your tuning parts is straightforward: you simply need to know your material, follow a few gentle washing techniques, regularly protect the clear coat against UV rays, and act quickly to address micro-scratches. Whether you drive with an ABS spoiler, a carbon-look paddle shifter, or carbon-effect covers, these universal principles—pH-neutral washing, clean microfiber cloths, UV protection, and careful drying—will keep your accessories looking as beautiful as the day you got them and prevent the yellowing, dullness, and marks that reveal a lack of care.
Would you like to equip your vehicle with quality parts available in ABS, with a carbon look, or in genuine carbon fiber, depending on your budget and preferences? Browse our entire tuning accessories and automotive lighting catalog: spoilers, paddle shifters, mirror covers, splitters, and much more, all designed to enhance your car. With regular, appropriate care, these accessories will remain a lasting aesthetic asset, trip after trip, season after season.
Recevez nos prochains guides en avant-première
Tutos pose, comparatifs aftermarket vs origine, sélection M Performance/AMG/RS, codes promos exclusifs.