The ideal interior tuning under €500: our 2026 selection
Car interior tuning under €500: the complete guide to cabin modification
Guide updated in 2026 — by the Becquet Voiture team
The essentials in 10 seconds
- With €500, you don't redo an entire interior: you target 3 areas — the driving position, lighting, floors, and seats.
- A budget split that works: 50% driving position, 25% lighting, 25% floors and details.
- The best value for money remains ambient lighting and the gear shift knob: less than €100 for a visible change every day.
- The most cost-effective car interior modification for used cars: replace worn plastics and faded buttons before adding carbon fiber.
- Golden rule: one dominant material. Three different finishes in one interior, and the result looks like a DIY job.
- Three priced scenarios at €500: driving priority, ambiance priority, finish priority — detailed tables below.
- Selections by brand (BMW, Audi, Volkswagen, Mercedes, Ford, Tesla): the budget is not split the same way depending on the original interior.
- DIY or professional installation: most items can be installed yourself, but any work on the steering wheel (airbag) must be done by a professional, without exception.
Car interior tuning suffers from a bad reputation inherited from the 2000s: purple neon lights, transparent shift knobs, and steering wheels that are too small. The reality of 2026 is quite different. Modern car interior modification consists of bringing a standard interior closer to what its high-end version would have been: more premium materials, better-balanced lighting, and more pleasant controls to touch. It is a matter of subtlety rather than show. This guide details how to achieve this result with a budget capped at €500: where to start, in what order to buy, which car interior tuning accessories really make a difference, what you can install yourself, and what is best left to a professional.
Transforming your interior for less than €500

You want a sporty, premium interior without emptying your account? Here is our selection of the most impactful interior accessories under €500 in total.

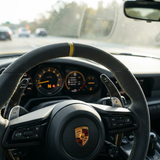
1. Carbon steering wheel paddles (from €49.90, €290 for the Competition models — surveyed 08/2026)
The #1 purchase that everyone makes. Instant M-Competition / AMG / RS look. Plug & Play in 10 minutes.

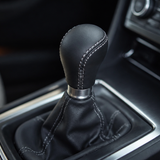
2. Premium gear shift knob (from €21 to €120 depending on the material — surveyed 08/2026)
Nappa leather, Alcantara, or brushed aluminum. A detail you touch with every gear change.
3. Replacement Start-Stop button (€33 to €55 — surveyed 08/2026)

Direct replacement for the worn or faded original button, without coding. It changes the look of the control; it does not store the Start/Stop status — it is an aesthetic item, not a disabling module.
4. Multifunction steering wheel buttons (€33 to €60 — surveyed 08/2026)
Replacement of worn/grayish buttons for a cockpit that looks like new.
5. Carbon steering wheel inserts (€45 to €140 depending on the brand — surveyed 08/2026)

Forged carbon trim for M / AMG / S-Line steering wheels.
6. Audi RS R8 paddle (€79 — surveyed 08/2026)

Compatible with the entire Audi RS range.
7. Mercedes-Benz Carbon Paddles (€149)

Compatible with A, C, E-Class (2014-2019).
8. A45 Paddle Extension (€79 — surveyed 08/2026)

9. LED door sill lighting (€49)
Premium lounge ambiance.
10. Aluminum sport pedals (€48 to €91 depending on the model — surveyed 08/2026)
Sport pedals covering the original pedals.
Total budget
If you take 5 products out of the 10 (the most impactful for your car), the total budget will be around €200 when choosing the most affordable references to over €700 if you choose the Competition carbon paddles and a high-end steering wheel insert. Five well-chosen items stay under €500 provided you compromise on a single expensive piece. Orders of magnitude surveyed in the catalog in August 2026: prices change, check the product sheet before building your budget.
Compatibility
All our interior accessories are available for: BMW, Mercedes, Audi, Volkswagen, Porsche, Ferrari, Maserati, Toyota, Honda, Ford, Renault, Peugeot, Citroën...
Discover our catalog
Explore our interior accessory collections.
The 3-zone method: where to start
The classic mistake in car interior tuning is buying on impulse: a trim here, a mat there, lighting because it was on sale. After six months, the interior looks like an accumulation, not a project. The method that works consists of dividing the interior into three zones and addressing them in order.
Zone 1 — the driving position. Steering wheel, paddles, knob or selector, pedal box, control buttons, instrument cluster surrounds. This is the area you look at and touch constantly. It concentrates 80% of the perception of quality of an interior. It is therefore where half the budget should go.
Zone 2 — the light. Roof light, floor lighting, door sill lighting, trunk lighting, glove box lighting, control backlighting. This is the most spectacular area per euro spent, especially on vehicles prior to 2015 whose original lighting is often yellowish and weak.
Zone 3 — the surfaces. Mats, door sills, console trims, trunk protectors, covers. This area does not catch the eye, but it determines whether the interior looks well-maintained or worn. On a car over ten years old, it even becomes an absolute priority: no carbon fiber will make up for a torn mat and a scratched door sill.
A fourth zone exists, audio, but it almost always goes over the €500 budget as soon as we talk about amplification or a subwoofer. We mention it below in the section dedicated to compromises.
To remember: address the zones in the order 1 → 2 → 3 on a recent car, and in the order 3 → 1 → 2 on a car over ten years old. Repair before beautifying.
Budget split item by item
Here is the split we recommend for a budget of €500, with the price ranges observed on the interior accessory market. It serves as a framework, not an absolute rule: a manual transmission driver will lean more towards the knob, an automatic transmission driver towards the paddles.
| Item | Recommended budget | Visual impact | Installation difficulty |
|---|---|---|---|
| Steering wheel paddles | 80 – 150 € | High | Easy |
| Knob / selector | 40 – 90 € | Medium but tactile | Easy to medium |
| Ambient lighting | 40 – 120 € | Very high at night | Easy to medium |
| Buttons and covers | 30 – 80 € | Medium ("new" effect) | Easy |
| Trims / inserts | 50 – 150 € | High | Medium |
| Sport pedal box | 30 – 70 € | Medium | Medium to high |
| Mats + sills | 50 – 130 € | Medium but durable | Very easy |
Two lessons stand out from this table. First, it is perfectly possible to stay under €500 by addressing five out of seven items. Second, the most spectacular items are not the most expensive: lighting and buttons are among the least expensive while producing the clearest "before/after" effect in photos.
Zone 1: redo the driving position

This is where the essentials are played out. A successful driving position gives the impression of being in a higher trim from the moment the door opens.
Steering wheel paddles
On an automatic transmission equipped with a sequential mode, the original paddles are often small, plastic, and unpleasant. Replacing them with extended paddles in machined aluminum or carbon fiber composite changes two things: the look of the steering wheel, and above all, the accessibility of the controls without letting go of the rim. Installation is generally by clipping or by screws, without removing the steering wheel and without working on the airbag. Always check that your vehicle actually has original paddles: on some trims they are absent, and it is then not possible to simply add them.
The knob or the selector
This is the permanent point of contact. On a manual transmission, a stitched leather, Alcantara, or brushed aluminum knob really changes the sensation of shifting gears. Watch out for weight: a heavy knob makes shifts more "settled", a light knob more crisp. The mounting system varies greatly from one manufacturer to another — screwing, clipping, pin — so you need a reference adapted to the vehicle. On an automatic transmission, the selector is often linked to the electronics, which limits the options to covers and the boot trim.
Buttons and controls
This is the most underestimated intervention. On a ten-year-old vehicle, the most used buttons — windows, mirrors, cruise control, steering wheel controls — lose their markings and take on an unattractive shiny gray appearance. Replacing them costs little, takes a few minutes, and immediately gives an impression of cleanliness. Before any aesthetic expense, this is the first thing to address.
Trims and inserts
Vent frames, lever surrounds, instrument cluster frames, door trims: these elements can be replaced or covered. Two schools exist. Replacement with a dedicated part gives the best result but costs more. Adhesive covering costs less but requires very careful installation to avoid bubbles and peeling over time, especially on curved surfaces.
The pedal box
An aluminum sport pedal box with non-slip inserts brings a visible sporty touch. Two mandatory precautions: choose a model whose rubber inserts well cover the contact surface, and check after installation that the pedal does not slip and that its travel is not modified. A poorly fixed pedal box is a real danger. In case of doubt, have the installation checked.
Zone 2: master the light
Lighting is the most powerful lever of low-budget car interior tuning. It transforms the perception of an interior without replacing anything.
The roof light and reading lights. Switching from yellowish halogen lighting to neutral white LED instantly modernizes. Pay attention to the choice of color temperature: a white that is too cold, above 6,000 K, gives a clinical look and ages poorly. A white around 4,500 to 5,000 K remains the most flattering for interior materials.
Floor lighting. Discreet strips under the dashboard and under the front seats. This is the ultimate "lounge" effect. Prefer moderate intensity: lighting that is too powerful reflects in the windshield and becomes annoying at night.
Illuminated door sills. They combine door sill protection and visual effect upon opening. Some models run on batteries, others connect to the existing door lighting.
Control backlighting. On older vehicles, some dashboard LEDs go out over time. Replacing them gives a homogeneous dashboard back. This is a more technical operation, which often involves removing the instrument cluster.
The trunk and the glove box. Two points often forgotten and yet very useful in daily life. A simple adhesive LED bar with an opening sensor costs a few euros.
On the question of colors: red, blue, and green have a strong decorative power but reduce readability and tire the eye on long trips. Some lighting colors are also regulated as long as they are visible from outside the vehicle. Stick to discreet shades and check the applicable regulations before any installation visible from the outside.
Zone 3: floors, seats, and storage
This is the everyday zone. It does not make you dream, but it determines whether your interior looks well-maintained or neglected.
Custom-fit mats constitute the most cost-effective purchase in this area. A set of thick velour mats with stitching, or rubber with edges for intensive use, costs little and lasts for years. "Custom-fit" is not a marketing argument: a universal mat slides, rides up under the pedals, and becomes dangerous. Always choose a reference specific to your model, with the original mounting points.
Door sills in brushed aluminum or stainless steel protect an area highly exposed to scratches. On a used car, they effectively mask already present wear marks.
Seat covers are divisive. Low-end universal models wrinkle and look cheap. On the other hand, a well-made semi-custom cover in quality faux leather or technical fabric can genuinely save stained or torn seats. One essential point to check: make sure the cover is compatible with the side airbags built into the seats. This is a non-negotiable safety issue.
The trunk mat and trunk sill protectors follow the same logic. In an estate car or SUV, it's an investment that preserves the resale value.
Storage — trunk organizer, document pocket, suitable cup holder — costs little and improves everyday life more than many decorative items.
Three concrete scenarios: €150, €300, €500

Scenario at €150 — "refurbishment"
Objective: erase wear. Replacement of the most damaged buttons, custom-fit floor mats, LED interior lighting kit, plastic restoration products. The result is not spectacular in photos, but the overall impression changes completely. This is the scenario to favor on a car over ten years old, or just before a resale.
Scenario at €300 — "character"
Objective: give an identity. We take the base of the previous scenario and add a strong element: either steering wheel paddles, or a premium gear shift knob accompanied by a matching boot, or a set of trim in a unique material. The important thing is to add only one dominant material at this stage.
Scenario at €500 — "complete coherence"
Objective: an interior that looks like it came from a higher trim level. Steering wheel paddles, matching gear shift knob or selector trim, full ambient lighting, mats and door sills, button replacement, plus one or two inserts. At this level, coherence is paramount: same material, same stitching shade, same family of finish on all added elements.
In all three cases, keep a reserve of about 10% of the budget for the unexpected: a broken clip during disassembly, a clip to replace, a higher quality double-sided adhesive. It's systematic.
To remember: it is better to have three coherent elements in the same material than seven mismatched elements. The budget is not the limiting factor: aesthetic discipline is.
Do it yourself or professional installation?
The question is not only financial: it involves safety on certain elements.
What can be done without particular difficulty: mats, adhesive sills, LED lighting on existing socket, clip-in buttons, clip-mounted steering wheel paddles, screw-in gear shift knob, organizers and storage. A screwdriver, a set of plastic spudgers and patience are enough.
What requires method: adhesive trim on curved surfaces, door panel removal, ambient lighting wiring harnesses to connect, bolted pedal box. Here, an error does not cost much but leaves traces: broken clips, marked plastics, bubbles under the adhesive. Watch a disassembly video specific to your model before starting, and always work on a tempered interior: cold plastic breaks.
What is best entrusted to a professional: everything related to the steering wheel itself and therefore the airbag, any intervention requiring the battery to be disconnected on a recent vehicle, any electrical connection to the original harness, and the replacement of seat elements containing a side airbag. The cost of an intervention is incomparable with that of a safety malfunction.
Useful tools to remain autonomous: set of plastic trim removal spudgers, Torx keys, isopropyl alcohol-based degreaser to prepare surfaces before gluing, automotive-grade double-sided adhesive, and a headlamp. The whole costs little and serves on all subsequent projects.
Choosing materials well
Real carbon is recognized by its depth: the weave appears under a layer of transparent resin and the pattern follows the curves of the part without deforming. It is more expensive, more rigid, and ages very well if it is UV-varnished. Forged carbon features a random marbled pattern rather than a regular checkerboard.
Carbon look — hydrographic print or adhesive film — costs significantly less. The result can be convincing from a distance, but the pattern does not follow the geometry of the part and deforms in the corners. It is an acceptable choice if the budget requires it, provided you stay coherent: never mix real carbon and imitation in the same field of vision.
Alcantara and suede microfibers bring a premium feel and excellent grip. Their disadvantage is maintenance: these materials mark, retain body oils and become shiny in friction areas. Reserved for low-use areas or to be accepted as a living material.
Machined aluminum remains the most durable value. It does not yellow, does not scratch easily if anodized, and its cold touch is appreciated. Only downside: it becomes very hot in the sun and very cold in winter, which matters for a gear shift knob.
Leather and faux leather. A good contemporary faux leather often ages better than low-end leather. The criterion to look at is the quality of the stitching and the flexibility of the material, not the commercial designation.
Maintaining a modified interior
A well-installed modification that is poorly maintained becomes a failed modification in eighteen months. A few simple rules are enough.
Varnished carbon is cleaned with a slightly damp microfiber, never with a product containing solvents or high concentrations of alcohol. A shiny plastic restorer can revive it, but avoid greasy products that leave a film.
Alcantara is brushed in the direction of the fibers with a soft brush, dry. In case of a stain, use a specific cleaner and work the entire area to avoid halos.
Anodized aluminum withstands classic cleaning. On a pedal box, regular cleaning prevents the accumulation of gravel that scratches the surface.
Adhesives. The weak point of any glued part is the first week. Avoid washing the interior, parking in direct sunlight, or stressing the part for 48 to 72 hours after installation. An automotive adhesive gradually reaches its maximum resistance.
LEDs. A flashing or abnormally hot LED indicates a power or quality problem. Do not let the situation persist: remove and replace.
Sun protection. The main enemy of a modified interior is ultraviolet. A windshield sunshade costs a few euros and extends the life of all materials, both original and added.
The most frequent mistakes
- Mixing materials. Carbon, alcantara, aluminum, and wood in the same interior: the result looks accumulated rather than designed. One dominant material, one secondary, no more.
- Decorating before repairing. Installing carbon next to a whitened plastic or a faded button highlights the defect instead of hiding it.
- Underestimating lighting. Many invest everything in materials and neglect light, although it costs less and is seen more.
- Applying adhesive to an unprepared surface. Without degreasing with isopropyl alcohol, the part will peel off at the first heat.
- Choosing a cover incompatible with side airbags. Major safety error, and yet very widespread.
- Installing a slippery pedal box. An all-aluminum pedal box without non-slip inserts is dangerous in rainy weather, wet shoes.
- Multiplying colored light elements. Beyond two points of color, the interior becomes tiring and the readability of the instruments decreases.
- Neglecting compatibility. An insert designed for one generation will not fit on the next, even if the model bears the same commercial name.
- Forcing disassembly. Interior clips break cleanly. Heating slightly and using plastic spudgers avoids 90% of the damage.
- Throwing away original parts. Keep them: they can be reinstalled before a resale and preserve the value of the vehicle.
Frequently asked questions about interior tuning
Does interior tuning lower the resale value?
It depends entirely on reversibility. Removable modifications — mats, paddles, gear shift knob, lighting — have no negative effect and can even enhance a well-presented vehicle. On the other hand, everything that is permanently glued, drilled, painted, or cut restricts the number of potential buyers. Keep the original parts in a labeled box.
What is the best first purchase for under €100?
On a recent car: a set of steering wheel paddles if the vehicle is equipped with them, otherwise a gear shift knob or selector trim. On an older car: replacing worn buttons, followed by an LED lighting kit. In both cases, the effect is immediate and the installation does not require any particular skill.
Can you add steering wheel paddles if the car does not have them?
This is generally not possible by simply adding an accessory. Paddles are connected to the steering wheel electronics and the gearbox management. On vehicles that did not have them originally, the operation involves a complete steering wheel conversion, often accompanied by coding. The add-on products found on the market are, in almost all cases, extensions intended for cars that already have them.
Do adhesive trims hold up over time?
Yes, on three conditions: automotive-grade adhesive, a perfectly degreased surface, and installation at room temperature. The observed peelings almost always come from insufficient surface preparation or installation in cold weather. Also avoid gluing on plastics treated with a greasy restorer.
Does a modified interior cause problems at the technical inspection?
Correctly fixed decorative elements generally do not cause difficulty. On the other hand, the following points are subject to special attention: freedom of movement of the pedals, absence of objects hindering driving, proper functioning of the dashboard warning lights, integrity of safety equipment, and readability of the instruments. In case of doubt about a modification, inquire with a technical inspection center before installation.
Should you disconnect the battery before working?
For any electrical connection, yes, it is the basic rule. Be careful, however: on many recent vehicles, cutting the battery leads to the loss of settings and sometimes the need to reset certain modules. Find out the consequences for your specific model, or entrust the intervention to a professional.
How long should you allow for the whole installation?
For a complete €500 project installed yourself, allow a full day or two half-days. Lighting takes the most time if you take care with cable routing. Never work in a hurry: most interior damage occurs when you force due to lack of time.
Is it better to buy a complete set or piece by piece?
The set guarantees the coherence of shade and material, which is a real advantage. Buying piece by piece allows you to spread the expense and check the quality before committing. Our advice: start with a test piece from the same seller, judge the finish, then complete.
Is real carbon worth it?
On parts seen up close and touched — lever trim, steering wheel trim, paddles — the difference is clear and justifies the price gap. On peripheral elements rarely looked at, a good quality carbon look is more than enough. Distribute the budget accordingly.
How to avoid the "2000s tuning" effect?
Three rules. One single dominant material. Neutral lighting colors or a single accent shade. And above all, no element that would not be credible on a high-end version of the same vehicle straight from the factory. If the manufacturer could never have offered it, be wary.
Can you improve the audio on this budget?
Partially. Replacing the front speakers with a higher quality set fits within a €150 to €250 parts budget, but then consumes half of the total budget. If audio is your priority, treat it as a separate project rather than integrating it into a €500 aesthetic budget.
What to do if a part does not fit?
Never force it. Take the reference again, check the generation and year of your vehicle, and contact the seller with photos. An uninstalled and complete part remains exchangeable under the conditions provided by the seller and by the regulations applicable to distance purchases. A forced part, on the other hand, is no longer.
Budget breakdown by item: three numbered envelopes
The percentage theory is useless until it has been translated into euros. Here are therefore three complete breakdowns for a €500 envelope, item by item, each corresponding to a different priority. These are decision frameworks for a car interior tuning project, not quotes: prices change, and a reference specific to a rare model always costs more than a widespread reference.
Scenario A — driving priority
This is the breakdown of the driver who spends a lot of time behind the wheel and judges an interior by what they touch. Everything starts in zone 1, the ambiance comes last.
| Item | Amount | Share | Why |
|---|---|---|---|
| Steering wheel paddles | €140 | 28% | Permanent contact, immediate visual effect |
| Gear shift knob + boot | €90 | 18% | Sensation of control, part touched a hundred times per trip |
| Buttons and controls | €70 | 14% | Erases wear, "new cockpit" effect |
| Sport pedal box | €60 | 12% | Visible when foot is placed, assumed sporty touch |
| Custom-fit mats | €70 | 14% | Essential base of cleanliness |
| Simple LED lighting | €30 | 6% | Roof light and readers only |
| Unforeseen reserve | €40 | 8% | Clips, adhesive, tools |
| Total | €500 | 100% | — |
Scenario B — ambiance priority
Here, the car is mainly used for evening trips, long highways, and passengers. The car interior lighting becomes the main item, and it produces the most spectacular "before/after" effect per euro spent.
| Item | Amount | Share | Why |
|---|---|---|---|
| Full ambient lighting | €150 | 30% | Floor, doors, console, glove box |
| Luminous door sills | 80 € | 16 % | Welcome mat, threshold protection |
| Interior and trunk LED kit | 50 € | 10 % | Replaces yellowed halogen |
| Premium shift knob | 70 € | 14 % | One tactile highlight is enough |
| Floor mats + trunk mat | 90 € | 18 % | Floor consistency with the interior |
| Storage and trim | 30 € | 6 % | Visual order, daily convenience |
| Contingency fund | 30 € | 6 % | Wiring, crimping, sleeving |
| Total | 500 € | 100 % | — |
Scenario C — finish priority
This allocation is aimed at resale or upgrading a vehicle that is ten years or older. No showy elements, but an interior that looks clean throughout. This is often the car interior modification that offers the best return on value.
| Item | Amount | Share | Why |
|---|---|---|---|
| Worn buttons and controls | 110 € | 22 % | The first flaw a buyer sees |
| Worn trim and inserts | 120 € | 24 % | Replaces discolored or sticky plastics |
| Floor mats + door sills | 120 € | 24 % | Hides the most visible wear |
| Interior LED kit | 45 € | 9 % | Freshens it up without replacing anything |
| Plastic restoration | 45 € | 9 % | Products, microfiber cloths, brushes |
| Details and storage | 30 € | 6 % | Creates an impression of careful maintenance |
| Contingency fund | 30 € | 6 % | Broken clips during disassembly |
| Total | 500 € | 100 % | — |
Key takeaway: none of the three scenarios exceeds three materials, and all include a 6 to 8% contingency fund. If your shopping list doesn't include a contingency fund, it's incomplete and not optimized.
Selections by brand: how they differ from one manufacturer to another
A €500 budget is not spent the same way on a 2012 German sedan and a 2023 electric compact car. Interior layout, parts availability, and wear points differ significantly. Here are the trends observed brand by brand. In all cases, the rule remains the same: check the exact part number and generation before ordering, as the same commercial name often covers several incompatible dashboard versions.
BMW
This is the brand with the widest range of interior car tuning accessories, particularly around the M Performance aesthetic: extended paddle shifters, carbon inserts, steering wheel trim, and lever covers. Two points of attention are worth knowing. First, the soft-touch surfaces of the 2000s and 2010s generations become sticky over time: on these vehicles, replacing or restoring the handles and console buttons takes precedence over any decoration. Next, the ecosystem of controls and screens evolves quickly from one generation to the next, making covers and trim highly dependent on the exact model year. Typical allocation for €500: around €150 for paddle shifters, €120 for trim, €100 for buttons and handles, with the rest for floors and lighting.
Audi
Audi interiors generally age well in terms of materials, which shifts the budget toward additions rather than repairs. The items that make the biggest difference: paddle shifters, vent trim, console trim, and ambient lighting, the latter of which was popularized by the brand with the interior light strip. Point of caution: on models equipped with a rotary dial infotainment system or a retractable screen, avoid any adhesive elements near moving mechanisms. Typical allocation: €130 for paddle shifters, €140 for ambient lighting, €110 for trim, with the balance for mats and sills.
Volkswagen
This probably offers the best value for money on the market, because the parts are very common and therefore affordable. On compact cars, the trio of shift knob, paddle shifters, and pedal box is enough to transform the perception of the driving position. However, recent generations with touch controls limit the possibilities around the center console: it's better to focus the effort on the steering wheel, floors, and lighting. Typical allocation: €90 for a shift knob, €110 for paddle shifters, €90 for a pedal box, €120 for mats and sills, €90 for lighting.
Mercedes
Highly styled interiors, where mismatched additions are immediately noticeable. Material consistency is even more important here than elsewhere. Paddle shifters and steering wheel trim work well, as does ambient lighting, since the brand has made it a signature feature. Pay special attention to door sills and seat trim covers, which are often specific to a particular body style. Typical allocation: €150 for paddle shifters, €130 for lighting, €120 for sills and mats, €100 for details.
Ford
More limited range of dedicated aesthetic parts, but very identifiable wear points: control buttons, door trim, floor mats. The budget therefore naturally shifts toward upgrading and toward quality universal accessories, chosen carefully. A pedal box, a set of custom-fit floor mats, and a well-balanced LED kit already produce a clear difference. Typical allocation: €120 for mats and sills, €100 for buttons, €90 for a pedal box, €100 for lighting, €90 for trim.
Tesla
A special case. The interior is minimalist, dominated by a large screen and continuous surfaces, which excludes most classic trim logic. The items that work are different: screen and console protectors, all-weather mats, trunk and front trunk organization, subtle ambient lighting, and above all, protection of light-colored surfaces that are highly sensitive to dye transfer from clothing. There are no paddle shifters on the steering wheel or shift knobs to replace. Typical allocation: €150 for console and screen protectors, €130 for full sets of mats, €120 for storage, €100 for lighting.
Key takeaway: the more styled and modern the original interior is, the more the budget should shift toward protection and lighting. The older it is, the more it should shift toward replacing worn parts.
Purchase priority order: what to start with, what to postpone
Many projects fail not due to a lack of budget but due to poor order. Here is the sequence we recommend, applicable regardless of the brand.
- Step 1 — clean and diagnose. Before buying anything, perform a complete interior cleaning. Many "flaws" disappear, and those that remain become your actual shopping list. Cost: almost zero. Benefit: avoids buying unnecessary parts.
- Step 2 — repair what is broken or worn. Faded buttons, missing clips, detached trim, sticky plastic. Any decoration applied before this step highlights the flaw instead of hiding it.
- Step 3 — the floors. Custom-fit floor mats and door sills. It's inexpensive, immediate, and sets the perception of cleanliness for everything else.
- Step 4 — the lighting. LED kit, then ambient lighting if the budget allows. This is the item with the best visual return, and it is entirely reversible.
- Step 5 — the driving position. Paddle shifters, shift knob, pedal box. You arrive here with an already clean interior, so the addition is truly noticeable.
- Step 6 — decorative trim. Inserts, trim, material elements. This is the last step because it is the most aesthetically engaging and the hardest to undo.
What to systematically postpone: any element you are not certain about compatibility, any purchase involving cutting or drilling, any work on the steering wheel itself, and audio, which deserves its own budget. Postponing is not giving up: it's avoiding buying the same part twice.
The three-week test. For any decorative element over €80, write it down and wait three weeks before ordering. A large part of the desire for trim does not survive this delay, and the budget thus preserved finances a truly useful item.
DIY installation or professional installation: the detailed comparison

The table below crosses the three criteria that really matter: the time you will spend on it, what the same operation would cost if entrusted to a professional, and the level of risk in case of error. The durations correspond to a first installation, without prior experience.
| Operation | DIY Time | Pro installation cost (estimate) | Risk if error | Verdict |
|---|---|---|---|---|
| Custom-fit floor mats | 5 min | — | None | Obvious DIY |
| Roof LED kit | 20 – 40 min | 30 – 50 € | Low | DIY |
| Clip-on paddle shifters | 15 – 30 min | 40 – 60 € | Low | DIY |
| Screw-on shift knob | 10 – 25 min | 30 – 50 € | Low | DIY |
| Adhesive door sills | 30 – 45 min | 40 – 70 € | Low (aesthetic) | Careful DIY |
| Curved adhesive trim | 1 – 3 h | 80 – 150 € | Medium | DIY if patient |
| Screw-in pedal box | 45 min – 2 h | 60 – 110 € | High (safety) | Professional check recommended |
| Wired ambient lighting | 3 – 6 h | 150 – 300 € | Medium to high | Depending on electrical comfort |
| Door panel removal | 1 – 2 h | 70 – 130 € | Medium | Methodical DIY |
| Steering wheel work | — | By quote | Critical (airbag) | Professional mandatory |
| Side airbag seat | — | By quote | Critical | Professional mandatory |
The red line that must never be crossed. Anything involving removing the steering wheel touches the airbag module. An airbag is a pyrotechnic device: its removal, storage, and reinstallation are subject to precise rules, and an error can cause it to deploy or, more insidiously, fail to deploy when it should. No aesthetic gain justifies this risk. If your project involves the steering wheel itself — cover, rim change, center trim — go through a professional, without exception. Clip-on paddle shifters, however, do not touch the module and remain accessible for personal installation.
The honest calculation. On a €500 budget, entrusting two operations to a professional easily consumes €100 to €200, or a third of the budget. The right approach is to install yourself everything that appears at the top of the table, and to reserve the paid intervention for the two or three lines that really require it. Many workshops also agree to simply check an installation you have performed, for a fraction of the price of a full installation. This is the best compromise for a pedal box.
Real lifespan of installed elements
Interior accessories have different expected lifespans depending on their nature and exposure. This guide helps you choose between an expensive, durable part and an affordable one that can be replaced.
| Item | Typical lifespan | Limiting factor |
|---|---|---|
| Aluminum paddles | Very long | Mounting, not the material |
| UV-resistant clear-coated carbon | Long | Direct sun exposure |
| Carbon-look film | Medium | Peeling at the edges |
| Alcantara / microfiber | Medium | Shining in high-friction areas |
| Leather shift knob | Medium to long | Sweat, hand creams |
| LED strips | Variable | Power supply and adhesive quality |
| Velvet floor mats | Several seasons | Driver-side heel |
| Adhesive door sills | Long if properly bonded | Initial surface preparation |
The practical conclusion is simple: spend your money on items that are mechanically fastened and built to last, and save on items that are glued on and easily replaced. A floor mat can be replaced without hassle; a peeling trim piece will leave adhesive residue that will need to be cleaned.
Four costly mistakes, explained in detail
1. Touching the steering wheel without assessing the risk
This is the most serious mistake, and it is often made through overconfidence after a few successful installations. The steering wheel contains the driver-side airbag module, a pyrotechnic device connected to the safety computer. Disconnecting it without following the proper procedure, placing it face down, storing it near a heat source, or reassembling a connector that is not fully locked are all actions that can have potentially serious consequences. An airbag warning light that comes on after work is not a cosmetic detail: it indicates that the system may be disabled. Verdict: always hire a professional. However, clip-on paddles and peripheral covers remain perfectly affordable for DIY installation.
2. Underestimating LED quality
Not all interior LEDs are created equal, and the difference is not apparent when you first unbox them. Key points to check: color consistency between two items from the same batch, the presence of a suitable resistor or regulator, the absence of visible flickering in peripheral vision, and how well they hold up after twenty minutes of operation. A cheap LED with a poor power supply will age and turn blue or pink, and the defect will only appear after several months—when half the interior is already fitted. The safest method is to order one pair first for testing, leave it running for an entire evening, and then complete the installation with items from the same batch.
3. Neglecting preparation before gluing
Almost all peeling is caused by three factors that can occur together: an uncleaned surface, installation at too low a temperature, or placing a part under stress too soon. The protocol that works: clean with isopropyl alcohol, let it dry completely, install in an interior at room temperature, press firmly for about thirty seconds in each area, and then avoid putting it under stress for two to three days. Also be careful with plastics that have been previously treated with a greasy dressing: the residual film prevents any lasting adhesion, and it must be completely removed before gluing anything on.
4. Forcing trim pieces off
Interior clips are designed for a limited number of manipulations and will snap cleanly when they are cold. Three rules prevent most damage: work in a climate-controlled vehicle, use plastic pry tools and never a screwdriver, and locate the exact position of hidden screws before pulling. Always set aside a few spare clips in your budget: it is a few euros that can prevent a trim piece from vibrating for years.
What feedback from users reveals
The following trends regularly emerge from conversations with owners who have undertaken this type of project. They are not individual accounts but observed consistencies, and they reflect the main points of this guide.
The most lasting satisfaction does not come from the most expensive parts. The items most frequently cited as "those I would do again without hesitation" are custom floor mats and replacing worn buttons—two modest expenses. Conversely, large decorative trim pieces are more often listed among the regrets, usually due to a lack of consistency with the rest of the interior.
The most common regret concerns the order, not the choice. Many report having bought a major item before addressing wear and tear, and then having to redo the entire project. This is exactly why the six-step sequence proposed above is recommended.
Lighting opinions are divided by intensity. Feedback is overwhelmingly positive when the installation remains discreet, and much more mixed when the intensity is high or the color is saturated, mainly due to nighttime distractions and reflections in the windshield.
Compatibility remains the leading cause of disappointment. Reported difficulties almost always involve an unanticipated change in generation or trim level that was not accounted for when ordering. This is why this guide repeatedly cautions: check the exact reference and generation before ordering, and if in doubt, ask for confirmation rather than attempting the installation.
Twelve additional questions about interior tuning
Where should I start if I only have €50?
A set of floor mats suited to your model, or replacing the two or three most worn buttons. These are the only expenses at this price point that make a visible difference every day.
How can I personalize a car interior without gluing anything on?
It is entirely possible and often preferable. Floor mats, mechanically fastened door sills, clip-on paddles, screw-on shift knobs, LED kits fitted to existing sockets, storage compartments: the entire set can be completely removed without leaving a trace, which preserves the vehicle's value.
Should I declare an interior modification to my insurer?
Requirements vary by policy. Removable and decorative accessories are generally not affected, but anything involving safety equipment or the vehicle's electrical system is worth asking your insurer about. A five-minute phone call costs less than a conversation after a claim.
Does ambient lighting consume a lot of power?
Interior LED lighting consumes very little power. The real concern is not power consumption but wiring: a setup permanently connected to a non-switched power supply can drain the battery in a vehicle that is rarely used. Choose a connection that turns off with the ignition.
Can you mix aluminum and carbon?
Yes, provided one is clearly dominant and the other is limited to small details. The combination becomes problematic when both occupy comparable surfaces within the same field of vision.
How should I choose the stitching color?
Use a shade that is already present in the interior, even if it is discreet. Introducing a completely new color requires repeating it in at least three places to make it look intentional, which costs more than expected.
Are universal accessories worth buying?
It depends on the item. For storage compartments, protective covers, and lighting, universal items are often perfectly satisfactory. For anything that must fit a specific shape—floor mats, trim pieces, door sills—model-specific items are far superior, and for floor mats, it is also a matter of safety.
What should I do about soft-touch surfaces that have become sticky?
There are two options: thoroughly cleaning the degraded coating, which requires patience and leaves a matte surface different from the original, or replacing the part. Gluing a trim piece over a sticky surface will not hold and should be avoided.
Does a sports steering wheel really change the driving experience?
The grip can indeed improve, but let us be clear: any work on the steering wheel involves the airbag module and should be done by a professional. Before considering a replacement, test what a simple improvement to the steering wheel environment can offer—paddles, new buttons, a thorough cleaning of the rim.
How long until an interior looks "finished"?
By working in stages and following the three-week test, allow two to three months for a €500 project. This is a deliberately slow pace: it gives you time to live with each addition before deciding on the next.
Can I go back if I do not like the result?
Yes, entirely, if you have followed two rules: keep all original parts labeled, and avoid drilling or cutting. This is precisely what distinguishes a controlled modification from a transformation you end up regretting.
How can I check compatibility before ordering?
Note the exact generation, the year the vehicle was first registered, the trim level, and the type of gearbox. Then compare the mounting points in the photos of the part with those on your vehicle. If in doubt, do not order: ask for confirmation. An uninstalled part can still be exchanged; a forced installation cannot.
Key takeaways: a successful interior car tuning project depends on three decisions—the right purchase order, a dominant material, and a clear understanding of what requires a professional. The budget comes in fourth place.
Additional guides on the driving position
To explore the two most cost-effective areas covered in this guide further, two dedicated articles are available on the blog. The paddle shifter buying guide details the types of mounting and compatibility points for each generation. The shift knob guide compares materials, weights, and mounting systems. If you are still undecided between genuine material and an imitation, our comparison of genuine carbon fiber versus carbon fiber imitations breaks down the question item by item. Finally, regarding the steering wheel itself, the article Performance steering wheel versus original steering wheel reminds readers of the precautions related to the airbag.
What each item really costs: price ranges observed in August 2026
The price ranges circulating for interior car tuning become outdated quickly: a discontinued reference comes back more expensive, a recent model lowers the price of the previous generation, and the same part name can cover very different qualities. The figures below are therefore dated estimates, taken from our catalog on August 12, 2026, and not fixed prices. They are intended to help you make a decision, not to lead you to order blindly: the product page is authoritative on the day of purchase.
Estimated prices by item (€; catalog data from 08/2026)
| Shift boot / knob cover | €18 |
| LED cup holder | €22 |
| Leather shift knob | €33 |
| Start-Stop button | €33 |
| Multifunction button kit | €60 |
| Steering wheel cover | €48 |
| Door sill lighting | €49 |
| Steering wheel insert | €60 |
| Interior LED bulbs | €45 |
| Aluminum pedals | €80 |
| LED door sills | €90 |
| Paddle shifter | €90 |
| Car floor mats | €140 |
| Seat cover | €130 |
| Armrest | €175 |
Three useful insights. First, the shift knob and its accessories are the least expensive items in the catalog: a boot or cover costs around twenty euros, while a complete leather shift knob costs around thirty. Next, the items that may seem secondary—custom car floor mats, car seat covers, armrests—actually cost more than decorative parts because they are model-specific and bulky. Finally, the price range within a single category is wider than the difference between two categories: a paddle shifter can cost anywhere from €49.90 to €290. This is where a €500 budget is decided, not in the choice of category.
A useful tip: note the date of your research next to each line in your shopping list. A budget based on prices from the previous year will almost always go over on the most expensive item—the one whose price you had underestimated.
Around the shift knob: boot, cover, and cap, the most sought-after item

On search engines, the shift knob overshadows all other interior accessories. Three separate parts orbit it that are often confused, even though they serve different needs and have different price points: the shift knob boot, the shift knob cover, and the shift knob cap.
Three parts, three uses not to be confused
- The bootthe leather or faux leather skirt that runs from the shift knob to the console: it covers the mechanism and is the first to crack. Around twenty euros, easy to replace yourself.
- The coverit slips over the original shift knob without removing it. The cheapest solution for a polished or glossy shift knob, but it makes the grip thicker.
- The capan added, often decorative shell that covers part of the shift knob. On an automatic gearbox, this is sometimes the only possible modification.
- The complete shift knoba straightforward replacement. On a manual gearbox, it is screwed on, clipped on, or pinned on, depending on the brand; it is the only choice that truly changes the shifting feel.
On an automatic gearbox, the question is different: the selector is linked to the electronics, and the parts sold are selector knobs specific to a model and generation. This is also the area where compatibility errors are most common: two sedans from the same brand, separated by one generation, do not have the same base. The step-by-step removal is detailed in our guide to changing a shift knob yourself.
Available shift knobs, boots, and caps


Car seat covers and custom-fit floor mats: the two most requested items

These are the two most popular searches across the entire world of car interior accessories, and yet they are also the two most poorly handled in low-budget projects. The reason is simple: neither car seat covers nor custom-fit car floor mats photograph well. You only notice them when you sit down—which is to say, every day.
Custom-fit or universal: what the price difference gets you
- Cut to fit the original mounting points
- No slipping under the pedals
- Designed with openings for seat side airbags
- Full coverage of the wheel arches and center tunnel
- Can be sold with the car or removed without a trace
- Price range noted 08/2026: €90 to €200
- Imprecise fastenings; mats that curl up
- Creases develop within the first few weeks
- Airbag compatibility rarely documented
- Areas left exposed beside the seats
- Looks like a “seat cover” when the door is opened
- Price range noted 08/2026: €20 to €60
Safety comes before appearance and price: a cover fitted to a seat with a side airbag must be designed for it, with a calibrated tear seam aligned with the module. The checks to make beforehand are detailed in our article on seat covers and side airbags, and take two minutes: find the airbag label on the side of the seat, then read the cover's product details.
For floor mats, three types are available in the catalog: velvet with decorative stitching for appearance, custom-fit rubber car mats with raised edges for heavy use and winter, and full sets that include the trunk. The deciding factor is not the material but the fastening: a mat without suitable eyelets can slide under the accelerator pedal. That's a safety issue, not a comfort detail.
Floor mats, seat covers, and armrests in the catalog


Car interior lighting: LED bulbs, door lights, and illuminated scuff plates
Car interior lighting delivers the best visual impact per euro spent, but it involves three projects of very different levels of difficulty. Tackling them in the wrong order is the main reason people abandon an installation halfway through.
Three lighting projects, from simplest to most involved
- 1. LED bulbs in existing socketsDome light, map lights, trunk, glove box, license plate. Just replace the bulbs—no wiring. Price range noted 08/2026: €25 to €90 per kit.
- 2. Door-entry lightsA projector that illuminates the ground when the door opens, powered by the existing door light circuit. Around €49 in the catalog; installation takes about an hour.
- 3. LED door sill platesThey protect and illuminate the door sills. Around €90 per set; surface preparation determines how well they hold over time.
- 4. Wired ambient lighting stripThe most striking and time-consuming option: routing wires through the trim and connecting to a switched power supply. Allow at least half a day.
Two rules will prevent most disappointments. First, use a consistent color temperature throughout the cabin; otherwise, the new dome light will make everything else look yellow. Second, connect to a power supply that switches off with the ignition, or a vehicle that isn't used often will eventually drain its battery. Our ambient LED strip installation guide explains how to route the wiring.
As for color: any lighting visible from outside the vehicle is subject to regulations, and saturated colors strain your night vision. Subtle LED car interior lighting in a single accent color will age far better than a multicolor gradient.
Cabin lighting and LEDs


Car interior accessories: what €100, €250, and €500 can actually buy
The three scenarios presented above use percentages. Here's the same approach translated into real-world shopping baskets, made up only of items actually available in the catalog, with price ranges noted on August 12, 2026. Each total is an estimate as of that date, not a price guarantee.
“First step” basket — around €100
- A shift boot or gear shift knob cover: around €20
- A cabin LED bulb kit: around €30
- An entry-level leather gear shift knob: around €33
- A reserve for clips and adhesive: around €15
“Character” basket — around €250
- Entry-level steering wheel paddle extensions: around €50
- A multifunction button kit: around €60
- Door-entry lighting: around €49
- A complete set of LED bulbs: around €45
- Reserve for supplies and consumables: around €25
“Cohesive look” basket — around €500
- A set of custom-fit floor mats: around €140
- A set of LED door sill plates: around €90
- A good-quality set of steering wheel paddle extensions: around €90
- A steering wheel trim insert: around €60
- A matching gear shift knob or selector: around €40
- Door-entry lighting: around €49
- Contingency reserve: around €30
What these baskets reveal, and percentages obscure, is that at €500, a single expensive item can throw the whole project off balance. A Competition carbon-fiber paddle set at €290 uses up the budget for four other items by itself. That's not an argument against it—it's a trade-off to decide on from the first line of the list, not discover at checkout.
One last precaution, whatever your budget: keep the original parts and plan for maintenance from the outset. Leather, Alcantara, and lacquered carbon fiber require different cleaning products, and using the wrong product often costs more than the part itself. Our complete guide to maintaining a tuned car interior covers the right care for each material.
Driver's area: paddle shifters, buttons, and steering wheel covers


Twelve budget and availability questions about upgrading your car interior
Twelve quick questions about the real cost and availability of items for a car interior accessory project. The prices quoted are approximate ranges noted in the catalog on August 12, 2026: they change, so check the product listing for current prices.
How much should I budget for a gear shift knob today?
According to the catalog on August 12, 2026, an entry-level leather gear shift knob costs around €21 to €33, a selector knob designed for a specific automatic transmission around €39, and a premium option or complete gear lever can exceed €200. Treat these as dated estimates: check the product listing on the day you order.
Can you replace a gear shift boot without removing the console?
On most manual transmissions, yes: the boot is clipped to a frame that can be pried loose with a plastic trim tool, with no special tools required. The tricky part is reinstalling the frame, which means putting each clip back in place before pressing down. Work in a warm cabin: a cold clip can snap clean off.
Is a gear shift knob cover a good solution?
It's the cheapest option when the original knob is worn and shiny but still in good condition. It conceals the wear immediately. The downside is the added thickness, which changes the feel in your hand, and a tendency to rotate slightly during use if it isn't tightened properly.
How can I tell whether a car seat cover is compatible with my side airbag?
Look for an “airbag” label on the outer side of the seat, next to the door. If there is one, the cover must be explicitly designed for that seat, with a tear seam aligned with the module. If the product listing doesn't clearly confirm this, don't install the cover: this is a safety issue, not a comfort precaution.
Custom-fit or universal: is the price difference worth it for floor mats?
For floor mats, yes—and above all for safety reasons: custom-fit mats use the original mounting points and won't slide under the pedals. In August 2026, the price ranged from around €20 for a universal set to around €140 for a good-quality vehicle-specific set.
What's the difference between door-entry lights and LED door sill plates?
The first is a projector that illuminates the ground when the door opens; it offers no protection and costs around €49. The second is a strip fitted over the door sill that protects the paint from shoe scuffs while lighting up; expect to pay around €90 per set. On a used car, the sill plate provides the more lasting benefit.
Do all steering wheel paddle shifters cost about the same?
No—the price range is wider than for any other cabin accessory. In August 2026, paddle extensions started at around €49.90, branded vehicle-specific paddles cost around €79 to €149, and a carbon-fiber set for Competition models reached €290. The price reflects the material and fit precision, not the length.
Can you upgrade a car interior without touching the steering wheel?
Yes, and it's actually recommended. Clip-on paddle extensions, a gear shift knob, console buttons, lighting, floor mats, sill plates, an armrest, and storage accessories cover most of the visual impact without going anywhere near the airbag module. A steering wheel cover is also an option: it slips over the rim and requires no disassembly.
Is an aftermarket center armrest worth the price?
It's the most expensive item on the list, at around €175 according to the August 2026 catalog, and it's also the one whose everyday benefit is most noticeable in vehicles that don't have one from the factory. First, check how it mounts: a poorly secured armrest can obstruct the handbrake and shift around with every turn.
How should I budget when prices change during a project?
Date each item on your list and update the prices as you order, one item at a time. A project spread over two or three months is bound to encounter price changes; a common mistake is relying on a price seen six months earlier for the most expensive item. Always keep 10% of your budget in reserve.
Should I choose a bundle or buy separate parts?
A bundle ensures consistent color and finish, which matters a lot when two parts are in the same field of view. Buying parts separately lets you spread out the cost and assess the quality before adding more. A sensible compromise: buy one test item from the same seller, then order the rest of the set.
Which parts are actually available for my car?
Availability depends more on the make and generation than on the budget. Paddle shifters, gear shift knobs, buttons, steering wheel inserts, and door sill lighting are mostly available as model-specific parts; floor mats, seat covers, LED bulbs, and cup holders are available for almost all vehicles. Note the generation, year of first registration, and gearbox type before comparing.
Popular searches: car interior tuning, car interior accessory, car interior dashboard accessory, gear shift knob, universal gear shift knob, tuning gear shift knob, automatic gear shift knob, change gear shift knob, how to change a gear shift knob, gear shift knob boot, gear shift knob cover, gear shift knob trim, gear shift knob protection, steering wheel paddle shifter, steering wheel paddle shifter for automatic gearbox, car seat cover, custom car seat cover, universal car seat cover, leather car seat cover, custom car floor mat, custom rubber car floor mat, personalized custom car floor mat, cheap custom car floor mat, car interior lighting, car interior LED lighting, car ambient lighting, car ambient lighting installation, LED door sill, door sill lighting, steering wheel cover, carbon steering wheel insert, steering wheel multifunction buttons, aluminum pedals, car armrest.
Learn more
If you are looking to give one of these accessories as a gift, our car enthusiast gift guide lists these products by budget and by profile. To understand the price differences between original parts and aftermarket parts, read our article on bodywork parts pricing. Finally, questions about warranty and consumer rights are detailed in a dedicated guide.
Customize your interior
Paddle shifters, trim, lighting, and interior accessories, sorted by make and generation.
Recevez nos prochains guides en avant-première
Tutos pose, comparatifs aftermarket vs origine, sélection M Performance/AMG/RS, codes promos exclusifs.