Carbon fiber dashboard trim: imitation vs. real carbon fiber, how to choose
On car forums and in product reviews, the same question comes up again and again: should you choose genuine carbon fiber dashboard trim or opt for a more affordable carbon fiber lookalike? Both options are available on the market, with sometimes considerable price differences, and it is not always easy to understand what really sets them apart once they are installed in the interior.
This comprehensive guide covers the topic in full: how to tell genuine carbon fiber fabric from an ABS replica, the advantages and limitations of each solution, how to choose the right one for your vehicle and budget, and how to install and maintain your trim so that it retains its shine over time. The goal is to enable an informed choice, free from misleading sales pitches or promises of universal compatibility that do not exist in reality.
This question is particularly relevant when personalizing the interior of a vehicle several years after purchase, when the original gray plastic or faux wood begins to look dated compared to the more modern finishes of recent models. Carbon fiber trim, whether genuine or a lookalike, remains one of the quickest ways to give a dashboard a sporty, contemporary look without completely redoing the interior.

Audi A3 8V carbon fiber look dashboard trim — view product
Genuine carbon fiber and carbon fiber lookalikes: what exactly are we talking about
Genuine carbon fiber (carbon fiber) is a composite material made by weaving carbon filaments, impregnating them with epoxy resin, then molding and polishing. It is a demanding industrial process that justifies a high manufacturing cost, but in return offers exceptional rigidity and lightness, highly sought after in motor racing.
Carbon fiber lookalikes, on the other hand, refer to several very different processes that visually reproduce the woven pattern of carbon fiber without using actual fibers: molded ABS parts with an engraved texture, carbon-patterned adhesive film applied to an existing surface, or even thermoformed vinyl. The visual appearance can look very close to genuine carbon fiber from a distance, but the mechanical properties and feel remain very different.
This distinction is essential before making any purchase: an interior trim insert does not have the same requirements as a structural bodywork component, which explains why carbon fiber lookalikes are widely available and perfectly suited for dashboard trim.
It is also important to distinguish the intended final use: a spoiler, hood, or rear diffuser is subject to very real aerodynamic and mechanical stresses, which fully justifies using genuine carbon fiber or equivalent structural composites for this type of part. A dashboard insert, by contrast, bears no significant mechanical load: its function is exclusively aesthetic, which completely changes the decision between the two materials.
How to tell genuine carbon fiber from a lookalike

Several simple clues help distinguish the two materials, even without technical expertise:
- Weight proves nothing: contrary to a very common misconception, a carbon-epoxy laminate is more dense than ABS (approximately 1.55 g/cm³ compared to 1.04 g/cm³), so it is heavier for the same volume. On a dashboard insert, the "genuine carbon fiber" version is moreover most often a thin layer of carbon fiber bonded to an ABS backing: it weighs more than the original part, never less. Weighing the part therefore does not provide a definitive answer—the clues that follow do.
- The feel of the texture: the weave of genuine carbon fiber has a slight irregular relief under a layer of glossy clear coat, while the molded ABS lookalike offers a more uniform and perfectly repetitive surface.
- The viewing angle: under raking light, genuine carbon fiber reveals slight irregularities in shine depending on the angle, due to the actual weave of the fibers, while a printed pattern maintains a flatter and more consistent appearance.
- The price: an unusually low price for a part advertised as "genuine carbon fiber" should be a warning sign, as the manufacturing cost of the actual composite remains inherently high.
- The edge of the part: on a cut genuine carbon fiber part, the edge reveals the fibrous structure; on a lookalike, the edge reveals solid plastic beneath the decorative layer.
Carbon fiber lookalike technologies: ABS, film, forged carbon

The term "carbon fiber lookalike" actually covers several technologies with very different qualities:
- Carbon fiber look ABS injection molding: the part is molded from rigid ABS plastic, with a carbon texture either engraved directly into the mold or applied by a factory-applied heat-activated film. This is the most common solution for dashboard inserts, offering a good balance of rigidity and price.
- Carbon fiber look adhesive film (car wrapping): a carbon-patterned vinyl is applied directly to the vehicle's original part after cleaning. This solution requires more skill to install but allows you to personalize any surface, not just the parts sold in kits.
- Forged carbon: an intermediate variant made of carbon fiber fragments compressed in resin, which creates a distinctive marbled pattern different from the classic weave, while retaining mechanical properties close to genuine carbon fiber.
For interior trim use such as a dashboard, carbon fiber look ABS remains the most popular choice because it combines ease of installation, long-term durability, and affordability.

BMW 1 Series F20 carbon fiber dashboard trim kit — view product
Advantages of genuine carbon fiber
Genuine carbon fiber retains real advantages, especially for the most visible parts or high-end projects:
- Lightness: a real advantage for large parts or bodywork components, less relevant for a small dashboard insert whose weight remains negligible regardless of the material.
- Mechanical strength: the composite resists impacts and bending better than standard ABS plastic, an important criterion for structural parts but secondary for decorative trim.
- Perceived value: the irregular grain and optical depth of the actual weave remain identifiable to a discerning eye, which can matter to some enthusiasts seeking complete authenticity.
- Material durability: epoxy resin resists UV rays and moisture well over the long term, without the clear coat yellowing like some low-end films.
Advantages of carbon fiber lookalikes for a dashboard
For interior trim such as a dashboard, carbon fiber lookalikes offer very practical advantages that explain their popularity:
- Significantly more affordable: an ABS carbon fiber look trim kit generally costs several times less than a custom-made genuine carbon fiber equivalent.
- Custom-cut for the exact vehicle: trim kits are designed specifically to fit the original cutouts of a particular model (BMW 1 Series F20, Audi A3 8V, Golf 6...), ensuring a perfect fit without modification.
- Easy installation without complex tools: unlike genuine carbon fiber, which often requires custom-made adjustments part by part, lookalike kits come ready to install with integrated 3M adhesive.
- Very convincing visual appearance from a distance: inside the cabin, under the dashboard's ambient lighting, the difference from genuine carbon fiber becomes difficult for an untrained eye to perceive.
- Easy replacement: in the event of a scratch or wear, an ABS part can be easily and affordably replaced, unlike a genuine carbon fiber part, which represents a heavier investment to replace.
How to choose the right one for your vehicle and budget
The choice between the two solutions depends above all on the desired use and the available budget:
- Precisely identify the vehicle's model and generation: BMW 1 Series F20 pre-facelift or facelifted, Audi A3 8V, Mercedes C-Class W205, Golf 6... each kit is designed for a specific configuration, with cutouts that are not interchangeable between generations.
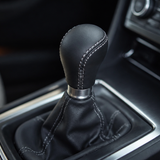
- Define the desired trim scope: dashboard only, including door panels, center console surround, gear shift knob... most references are available as single items or complete packs, with a price that decreases as more parts are added.
- Estimate the overall project budget: for a complete interior trim job, carbon fiber look ABS allows you to cover several areas (dashboard, door panels, console) for a budget often lower than the price of a single custom-made genuine carbon fiber part.
- Consider the vehicle's original finish: on a vehicle already equipped with glossy plastic or aluminum trim, carbon fiber look ABS generally integrates without difficulty, with a bold and deliberate aesthetic contrast.
A closer look at the ranges available by make and model
The range of carbon fiber look trim varies considerably from one make to another, depending on the complexity of the original dashboard and the popularity of the model for customization:
- BMW (1 Series F20, 2 Series F22, 3 Series F30, 4 Series F32/F33/M4 F82): the ranges generally cover the dashboard, iDrive surround, gear shift knob, and sometimes the headlight control surround, with complete 4-piece packs for a consistent interior transformation.
- Audi (A3 8V): kits are often available in "dashboard only" or "dashboard + 4 door panels" versions, allowing you to adjust the scope according to the available budget.
- Volkswagen (Golf 6): kits primarily target the dashboard and center console, the areas most visible to the driver on a daily basis.
- Mercedes (A-Class W177/CLA C118, C-Class W205, GLC W253): the range is particularly extensive for this make, with trim for the dashboard, door panels, center console, armrest, and even the air vent surround, allowing for a nearly complete interior trim job piece by piece.
This diversity of ranges clearly illustrates the logic of the market: the more popular a model is for customization, the more targeted the trim insert range becomes, allowing you to precisely tailor the project to the available budget.
Carbon fiber lookalikes and overall tuning project: where to start
For anyone planning a broader interior overhaul rather than a simple one-off touch-up, a few guidelines help prioritize spending:
- Start with the areas most visible on a daily basis: the dashboard and center console surround naturally catch the driver's eye on every trip, before the door panels or peripheral areas.
- Spread the investment over time: nothing prevents you from starting with the dashboard alone, then adding the door panels and center console later, as most ranges are designed for modular installation.
- Harmonize with other already customized elements: a leather/carbon fiber steering wheel, gear shift knob, or carbon fiber paddle shifters will create a stronger visual consistency with matching dashboard trim.
- Keep reversibility in mind: unlike paint or permanent machining, adhesive carbon fiber look inserts can be removed (with care) if the aesthetic project evolves, a significant advantage for those who like to update their interior over time.
Dashboard carbon fiber trim installation guide

Installing a carbon fiber look trim kit remains accessible to a methodical DIYer by following these steps. Allow for a relaxed morning rather than a rushed job between trips: the quality of the final result depends directly on the care taken at each step, especially on surface preparation, which determines the long-term bond of the adhesive.
- Thoroughly clean the original surfaces with a silicone-free degreasing product, then allow them to dry completely before applying anything.
- Check the fit of each part in its location before removing the protective film from the adhesive, using the guides or numbers provided in the instructions if necessary.
- Gradually remove the protective film from the 3M adhesive, avoiding peeling it off all at once to maintain precise control over positioning.
- Position the part precisely before making final contact with the surface, as the double-sided adhesive used is generally very strong from the first contact.
- Apply uniform pressure over the entire surface, from the center to the edges, using a soft cloth or flexible squeegee to remove any air bubbles.
- Leave to set for 24 to 48 hours before any mechanical stress (cleaning, repeated contact) to allow the adhesive to reach its maximum bonding strength.
For a more detailed method on surface preparation and choosing the right adhesive, our guide 3M adhesive: choose and prepare the bonding surface provides useful additional information.

Carbon fiber dashboard inserts for VW Golf 6 — view product
▸ Our recommended accessories


Care and cleaning of carbon inserts (imitation vs genuine)
Care differs slightly depending on the nature of the material:
- ABS carbon imitation: regular cleaning with a slightly damp microfiber cloth is sufficient, avoiding abrasive products that could dull the surface varnish. Specific plastic/dashboard care products are perfectly suitable.
- Carbon-effect adhesive film: more sensitive to harsh solvents that can peel the edges of the film, gentle cleaning with mild soap is recommended, never using concentrated alcohol directly on the edges.
- Genuine carbon: the finish varnish (usually a polyurethane resin) requires the same precautions as a painted bodywork, with occasional polishing possible to restore the original shine if necessary.
- In all cases, avoiding prolonged exposure in direct sunlight without protection remains a good practice to limit the premature aging of varnishes and adhesives, regardless of the material chosen.
Compatibility and pre-purchase checks
Before ordering an insert kit, a few checks can prevent disappointment:
- Precisely identify the vehicle generation (pre-facelift or facelifted), as dashboard cutouts can differ significantly from one version to another of the same model.
- Check the original trim level: some vehicles have options that change the layout of the controls or vents, which can affect the exact compatibility of a generic kit.
- Compare the product photos with your own dashboard, handle by handle, control by control, rather than relying solely on the model designation.
- In case of doubt, contacting customer service with photos of the vehicle interior remains the best way to confirm compatibility before ordering, especially on facelifted versions or special trims.
Tools and equipment needed for a successful installation
Unlike other interior tuning accessories, installing carbon-effect inserts does not require expensive specialized tools. The following equipment is generally sufficient for a professional result:
- A silicone-free degreasing product (diluted isopropanol or specific surface preparation cleaner) to remove any traces of grease, wax, or dust before bonding.
- Clean, lint-free microfiber cloths, one for cleaning, another reserved exclusively for final squeegeeing to avoid redepositing particles on the adhesive.
- A flexible squeegee or rigid plastic card to gradually push air bubbles from the center to the edges during application.
- A light heat source (hair dryer set to a moderate temperature) useful on curved areas to slightly soften the adhesive backing and improve the fit of complex shapes.
- A fine utility knife to occasionally trim an edge if the original cutout has a slight variation compared to the supplied part, to be used with caution so as not to damage the original surface.
None of these items require a significant investment, which enhances the accessibility of this type of project for a DIY enthusiast with a minimum of rigor and patience.
Estimated lifespan and signs of aging to watch for
A properly installed carbon-effect insert kit generally maintains a satisfactory appearance for several years of daily use. However, a few signs indicate that replacement could be considered:
- Yellowing of the protective varnish under the cumulative effect of UV rays, particularly visible on areas most exposed to the sun such as the top of the dashboard.
- Repeated micro-scratches due to regular contact with objects (keys, jewelry, fingernails), which gradually dull the original glossy appearance.
- Partial edge peeling, often linked to overly aggressive cleaning near the edges or prolonged exposure to intense heat (direct sunlight, extended summer without sunshade protection).
- Localized discoloration in case of repeated contact with unsuitable chemicals (strong solvents, non-automotive household products).
In most of these cases, a targeted replacement of the affected part alone is sufficient, without the need to redo the entire kit, an additional practical advantage of the modular carbon-effect solution compared to genuine carbon trim which is generally more difficult to partially repair.
Common mistakes to avoid
Certain mistakes regularly occur among buyers unfamiliar with this type of accessory:
- Confusing generations of the same model: a kit designed for a pre-facelift F20 will not fit perfectly on a facelifted version with different cutouts.
- Neglecting pre-cleaning: the slightest trace of grease or dust under the adhesive permanently compromises the hold of the installed part.
- Installing in an environment that is too cold: 3M adhesive loses its bonding power below approximately 15°C, it is preferable to install in a tempered interior or slightly warm the surface before application.
- Trying to reposition a part that has already been bonded: since double-sided adhesive is very sticky, removal after full bonding risks damaging the original paint or plastic; it is better to take your time during the initial positioning.
- Buying a part advertised as "genuine carbon" at an abnormally low price: this type of listing generally hides an ABS imitation or a film, without this necessarily being a problem if the budget matches, but the disappointment comes from the discrepancy between the listing and the reality of the product.

Carbon dashboard and armrest inserts Mercedes C-Class W205 — view product
Forged carbon and other premium variants: when to consider them
Between entry-level carbon-effect ABS and high-end woven genuine carbon, there is an intermediate range of materials that deserve to be known before making a final choice:
- Forged carbon mentioned above offers an interesting compromise: compressed fragments of real fiber in a resin give a distinctive marbled pattern, different from the classic weave, with actual mechanical properties superior to ABS but a lower manufacturing cost than traditional woven carbon.
- 3D textured films reproduce the carbon weave relief on the surface, on a vinyl backing thicker than standard films, offering a better tactile impression than a classic flat film while remaining significantly less expensive than a molded ABS part.
- Brushed aluminum carbon-effect inserts combine a rigid metal core with a carbon decorative finish, a rarer option but one that appeals for its robustness against repeated impacts, for example on the most handled areas such as the gear shift lever surround.
For a first dashboard trim project, carbon-effect ABS remains the most rational entry point: it covers most aesthetic needs at a controlled price, with a much wider range of custom-fit cutouts than the premium alternatives mentioned above.
Differences in appearance according to the finish: glossy, matte, satin

Beyond the choice between imitation and genuine carbon, the surface finish strongly influences the final appearance in the interior:
- Glossy finish: the most common, it accentuates the visual depth of the woven pattern and comes closest to the sports or competition bodywork appearance, at the cost of a greater sensitivity to micro-scratches and fingerprints.
- Matte finish: more discreet and modern, it limits unwanted reflections under direct sunlight, a real plus for surfaces near the windshield where reflections can interfere with visibility.
- Satin finish: a compromise between the previous two, increasingly offered on recent ranges, which retains some visual depth while limiting excessive reflections.
The choice of finish remains above all a matter of personal taste and consistency with the rest of the interior, but it is worth checking the availability of the different finishes before confirming an order, as some references only exist in glossy.
Impact on resale and perceived vehicle value
A well-installed and high-quality carbon-effect interior trim generally enhances the interior of a vehicle in the eyes of a potential buyer, provided that the installation is clean and the cutouts are perfectly fitted. Conversely, a poorly executed installation (air bubbles, cutout misalignment, peeling edges) can give the opposite impression of sloppy DIY.
This is why the choice of a kit designed specifically for the exact vehicle model, rather than a generic adhesive cut by hand, remains the best guarantee of a finish close to the original manufacturer's, both for one's own driving pleasure and with a view to a future resale.
Origin and manufacturing: how are these inserts produced
Understanding the manufacturing process helps to better assess what one is actually buying:
- For carbon-effect ABS inserts: the part is first designed in 3D from a scan or an accurate survey of the original dashboard, in order to faithfully reproduce every cutout, every button, every vent. A specific mold is then made for plastic injection, before applying a film or a carbon-effect texture, then a UV protective varnish.
- For genuine carbon: woven carbon fiber sheets are cut then stacked in a mold according to a precise weave angle, impregnated with epoxy resin, then baked under pressure in an autoclave to polymerize the resin and give the part its final rigidity. Sanding and varnishing complete the finish.
- For carbon-effect adhesive films: a pattern is printed or embossed on a flexible vinyl backing, equipped with a pressure-sensitive adhesive that facilitates bubble-free installation on curved surfaces.
This difference in process largely explains the price gap between the solutions: mass plastic injection remains significantly less expensive than autoclave curing of a woven composite, which directly impacts the final price offered to the customer.
Budget comparison: carbon imitation vs genuine carbon
The price differences between the two solutions remain significant:
- Carbon imitation insert kit (single part): generally between €50 and €80 depending on the vehicle model and the part concerned.
- Complete pack (dashboard + doors + console): from €120 to €150 on average, a tiered price compared to buying the parts separately.
- Custom-made genuine carbon part: the price quickly climbs beyond several hundred euros for a single interior trim part, due to the manufacturing cost of the composite and the custom cut.
For a complete interior trim, carbon imitation therefore allows covering a much wider scope for a controlled budget, which explains its popularity for this specific use. At an equivalent budget, it is thus possible to trim the entire dashboard, doors, and center console in carbon imitation, where the same amount would barely be enough to finance a single small custom-made genuine carbon part — a value-for-money ratio that largely explains why the vast majority of interior tuning projects opt for this solution.
Common misconceptions about carbon imitation
Several misconceptions still circulate around carbon imitation, which are worth clarifying before any purchase:
- "Carbon imitation necessarily peels off over time": this is only true in case of a botched installation (poorly degreased surface, installation in cold weather) or a low-end product with poor-quality adhesive. A serious kit installed properly holds for several years without problem.
- "You cannot tell the difference with genuine carbon": in reality, a trained eye distinguishes the two quite easily at a short distance, especially at the level of the grain and the weave relief. The confusion remains frequent for an untrained eye, which explains the commercial success of the imitation.
- "Genuine carbon is always stronger": for an interior trim use not subject to major mechanical constraints, the difference in robustness between a quality ABS and a woven composite remains barely noticeable in daily use.
- "Generic kits fit all models": false in the vast majority of cases for dashboard inserts, which require a custom cutout related to the exact shapes of the model and its precise generation.
- "You have to be a professional to install these inserts": a methodical, patient, and diligent DIYer generally achieves a very satisfactory result on the first attempt, provided they scrupulously follow the surface preparation steps.
How is the choice made between several available colors and patterns
Beyond the choice between imitation and genuine carbon, some ranges also offer variations in pattern or shade that deserve to be taken into account:
- The classic weave pattern (2x2 twill) remains the most widespread and recognizable, with its regular grid characteristic of automotive and competition carbon.
- The marbled forged carbon pattern, rarer on standard interior inserts, brings a more organic and less uniform appearance, appreciated for standing out from the already very widespread classic carbon trims.
- Colored carbon shades (blue, red, gold) exist on some premium ranges, retaining the visual texture of the weave under a translucent colored shade, an option that allows matching the interior trim to the body color or the upholstery piping.
These variations remain secondary compared to the fundamental choice between imitation and genuine carbon, but they offer an additional margin of personalization for those who want a truly unique appearance in their interior.
Legal framework: is the installation of interior inserts regulated
Unlike exterior bodywork modifications (wheel arch extensions, body kits, spoilers), adding decorative inserts to the interior of a vehicle is not subject to any specific regulations in France, provided that the modification does not affect the vehicle's structure or safety systems (airbags, seat belts, steering column).
One precaution should be kept in mind: ensure that no sensor, airbag, or active safety element is covered or obstructed when installing an insert, especially in areas near the steering wheel, glovebox (passenger airbag), or door pillars. If there is any doubt about the exact location of an airbag or sensor, official resources such as service-public.fr can provide guidance on the general safety principles applicable to vehicle modifications, even though this type of decorative trim remains outside the scope of statutory technical inspections.
FAQ — Carbon Fiber Dashboard Inserts
Do carbon-look inserts last?
Yes, a quality kit installed correctly (clean surface, 3M adhesive, even pressure) will last for several years without peeling, provided that repeated thermal shock and prolonged exposure to direct sunlight are avoided.
Can a carbon-look kit be installed on a dashboard that is already damaged?
It is preferable that the original surface be clean and free of deep cracks, as the adhesive requires a stable base to bond durably. Minor superficial scratches generally do not pose a problem.
Is real carbon fiber more scratch-resistant than carbon-look?
Both materials are covered with a protective clear coat of comparable hardness; scratch resistance depends more on the quality of this clear coat than on the nature of the substrate (real carbon fiber or ABS).
How long does it take to install a complete kit?
Allow approximately 30 to 60 minutes for a dashboard kit alone, and 1 to 2 hours for a complete package including door panels and the center console, excluding drying time.
Can the inserts be removed without damaging the original dashboard?
Careful cold removal (plastic spatula, gentle heat from a hairdryer to soften the adhesive) generally allows the piece to be removed without major damage, but adhesive residue may remain and require additional cleaning.
Is there a risk of distracting reflections with glossy inserts?
In certain positions (particularly on the windshield), a very glossy clear coat can create slight reflections depending on the angle of the sun; matte or satin versions, when available, limit this effect.
Can a carbon-look kit hide an imprecise cut in the original dashboard?
No, the kits are designed to fit the original manufacturer's cutouts exactly; they do not compensate for a pre-existing defect on the original part, which should be corrected before installation if necessary.
Does the dashboard need to be removed to install the inserts?
No, in the vast majority of cases, installation is done directly on the parts in place, without removal, which considerably simplifies the process compared to replacing a car stereo or electronic module.
Carbon fiber density: why weighing the part proves nothing

This is the most persistent misconception in interior tuning, and it deserves to be debunked once and for all, because it leads buyers every year to validate a part based on a criterion that says exactly the opposite of what they believe. The density of carbon fiber is not lower than that of plastic: a carbon-epoxy laminate weighs approximately 1.50 to 1.60 g/cm³, while injection-molded ABS weighs around 1.04 to 1.06 g/cm³. In other words, if you cut a one-centimeter cube from each of the two materials, the carbon cube would be about 50% heavier. Carbon fiber is not a lightweight material: it is a rigid material.
So where does carbon fiber's reputation for weight savings come from? From its thickness, not its density. An injection-molded ABS body panel needs 3 to 4 mm of wall thickness, often reinforced with ribs, to hold its shape without vibrating; a few layers of 1.5 to 2 mm laminate are enough to achieve the same rigidity. The finished part therefore comes out 30 to 50% lighter — but the gain comes from the design, not the material. Two other guides on this blog use the same figures and detail them part by part: the carbon fiber, fiberglass, or ABS spoiler comparison breaks down the four common materials, and the M3, M4, and M Performance carbon fiber guide explains why the same rule applies to genuine M Performance parts.
On a dashboard insert, the conclusion is even clearer, and it goes directly against intuition. A trim piece is not a structural part: it supports nothing, it just dresses the interior. The "real carbon fiber" version sold for an interior is therefore almost never a solid composite part, but a carbon fiber skin — one or two layers of 3K fabric laminated and then varnished over the original plastic support, or over a reproduction ABS shell. Material is added to an existing part: the result mechanically weighs more than the original part, never less. A buyer who weighs a laminated insert and finds it "heavy, therefore fake" is wrong twice.
The test that remains foolproof costs nothing: turn the part over. A genuine composite reveals the fabric weave on the edge and often on the back, where an adhesive film ends abruptly and reveals its backing. And keep in mind that on an insert weighing a few dozen grams, the mass difference between the two solutions is measured in grams: even if exact, it would be imperceptible to the touch anyway.
Carbon-look by dipping: what hydrography is really worth

Among the queries that come back on the subject, carbon-look by dipping holds a special place: it is the industrial process behind the vast majority of "carbon-look" inserts sold today, and almost no one knows how it works. Its technical name is hydrography, or water transfer printing. The principle consists of four steps and has nothing artisanal about it.
The quality of a hydrographic insert depends almost entirely on two points invisible at the time of purchase. The first is the clear coat: it is what gives depth, scratch resistance, and UV protection. A cheap insert saves on this layer, and that is why it fades in two or three summers behind a windshield. The second is the scale of the pattern: the film is an image, it distorts where the part is strongly curved, and a serious manufacturer adapts the size of the printed weave to the geometry of the part so that the weave pitch remains uniform once installed.
One last point, often misunderstood: hydrography only applies to a part, never to a glued trim. A hydrographic insert is therefore a replacement part, while an adhesive kit is a layer applied over the existing one. Both are sold under the label "carbon-look" even though they do not follow the same installation logic, nor the same budget. For the maintenance of the clear coat, which is identical in both cases, our guide on maintaining carbon fiber and ABS parts details the products to avoid.
3D, 4D, or 5D carbon vinyl: what difference on a dashboard
"3D or 5D carbon" is a query asked as is, hundreds of times a month, and for good reason: these terms have no standardized definition. They were born from the marketing of film manufacturers, and everyone uses them a bit differently. Despite this, there is a sufficiently stable consensus in the industry to make sense of it, and it depends on only two parameters: the physical relief of the film and the gloss of its surface.
4D is somewhere in between: a slight embossing combined with partial gloss, with a depth effect achieved through two-layer printing. For an interior, the choice generally comes down to a purely practical criterion rather than the commercial name. A glossy 5D carbon vinyl looks very impressive on a center console or speaker surrounds, but it reflects the light from the windshield and reveals every fingerprint on the areas we touch. A matte 3D, on the other hand, visually disappears into a dashboard and withstands daily handling without ever looking dirty.
The installation of carbon film inside a car also follows a rule that exterior installation ignores: the interior temperature varies greatly, from below zero in winter to over sixty degrees behind a windshield in summer. A film installed on a warm surface, between 18 and 25 °C, and squeegeed from the center to the edges, will last for years; the same film installed in a cold garage will peel at the corners from the first strong heat. On very curved parts, the gentle heat of a hairdryer allows the vinyl to be stretched without whitening the pattern — as soon as the black turns to gray, the heat is too high.
Carbon trim and accessories for the interior


Carbon insert BMW, Golf, Audi or Tesla: what changes from one model to another
Inserts are almost always searched for by model, and rarely by material: "BMW E92 carbon insert", "Golf 7 interior carbon kit", "Tesla Model 3 carbon insert", "Audi RS4 B9 interior carbon kit" are among the most repeated formulations. This reflex is the right one: the cutout takes precedence over everything else. But the constraints are not the same from one manufacturer to another, and it is worth knowing before ordering.
At BMW, the dashboard consists of a large number of small removable elements — dashboard trim, air vent surrounds, shifter surround, door panels — and most snap off without a specific tool. This is the most favorable ground for multi-piece kits: an E90, an E92, or an F30 accepts a package of eight to fifteen inserts, and the original M Performance ranges have made a large-weave carbon fiber standard that aftermarket kits faithfully reproduce. Pay attention, however, to the differences between phases: a pre-facelift F20 and a facelifted F20 do not have the same vent surrounds.
On Volkswagen, the logic is the opposite: the Golf 7 and Golf 8 concentrate the trim surfaces in a few large dashboard and door panel pieces. The kits have fewer pieces, but each is large, which makes the cutout all the more critical — a one-millimeter offset is visible on a thirty-centimeter part. On the Golf 8, the almost entirely smooth dashboard and the flush center screen also greatly reduce the trim areas.
At Audi, the original inserts are designed as interchangeable decorative bars, clipped into a rail. This is the manufacturer where replacement with a complete part, rather than a glued trim over the top, is the easiest: on an A4 B9, an S4 B8, or an RS4, you remove the original aluminum bar and clip the carbon bar in its place, without adhesive. The result is clearly superior to a film, and the operation remains reversible.
On Tesla finally, the Model 3 and Model Y pose a unique case: the dashboard is a single, long piece of material, and it is precisely this part that most owners seek to trim. A Tesla kit is therefore made up of one or two very large pieces, often offered in genuine carbon fiber precisely because such a visible part does not forgive any pattern defect. Our comparison of Model 3 and Model Y interior accessories details the dimension differences between the two models, which do not share the same blade length.
Full interior trim: carbon, brushed aluminum, or Alcantara
The carbon fiber interior trim is only one of the three families of finishes that are systematically found in searches, alongside brushed aluminum and Alcantara. Choosing between them is not just a matter of taste: the three do not have the same durability, nor the same installation requirements, nor the same effect on the perception of the interior.
The price of an interior trim is read in three items, and the film is never the heaviest of the three. The material represents a modest part of the total; the installation time, on the other hand, explodes as soon as you have to remove parts to tuck the edges properly. A trim glued over the existing one is installed in one to two hours; the same interior with the removal of door panels and console surrounds requires a day in the workshop. The third item, often forgotten, is the rework: a bubble or a raised edge that appears three weeks later is difficult to correct without re-installing the part.
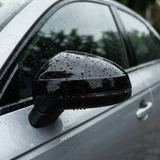
A simple rule avoids the most frequent pitfall, that of the "patchwork" interior: do not mix more than two finishes in the same field of vision. Carbon and Alcantara work well together because they contrast sharply, one glossy and structured, the other matte and soft. Carbon and brushed aluminum, on the other hand, compete for the same role and neutralize each other. The choice of finish deserves the same attention as the choice of material — this is the reasoning we apply to the matte, glossy, or carbon fiber mirror caps, and it applies word for word to the interior.
Finally, whatever finish is chosen, maintenance decides the lifespan much more than the initial quality. A carbon clear coat tarnishes under alcohol-based products, a suede-like material shines under a cloth pressed too hard, brushed aluminum scratches in the opposite direction of the brushing. Our complete tuning interior maintenance guide covers each of these materials with the appropriate products.
To prolong the carbon finish in the interior


Additional FAQ: density, processes, films and compatibility
Twelve questions that come up after reading a carbon insert guide, complementing the FAQ above without repeating it. The specific gravity values mentioned are the standard engineering values for common laminates and injection-molded plastics.
Is carbon lighter than ABS for the same volume?
No, it's the opposite. A carbon-epoxy laminate weighs around 1.50 to 1.60 g/cm³, while injection-molded ABS is around 1.04 to 1.06 g/cm³: for the same volume, carbon is denser, and therefore heavier. Nevertheless, a carbon body panel ends up being lighter because it is much thinner for the same rigidity. The weight saving comes from the wall thickness, not the material density.
Can you tell if it's real carbon by weighing the part?
No, and it's a misleading test. On a dashboard insert, the "real carbon" version is almost always a carbon skin bonded to an ABS support: material is added to the part, so it weighs more than the original. Instead, look at the weave texture under the clear coat, the irregularities of the pattern from one part to another, and the weave visible on the edge and the back of the part.
What is carbon dip imitation?
It's hydrography, or water transfer printing: a printed film with a woven pattern is floated on a tray of water, its backing is dissolved by a solvent, then the part is dipped into the tray so that the ink adheres to all its surfaces, including curves. The part is then rinsed, dried, and clear-coated. It is the industrial process used for the vast majority of carbon-effect inserts on the market.
What is the difference between 3D, 4D, and 5D carbon film?
These terms are not standardized, but their usage is consistent: 3D is a textured vinyl, matte to satin, whose weave can be felt with the finger; 5D is a printed pattern under a thick, smooth-to-the-touch glossy layer, like clear-coated carbon; 4D is somewhere in between, with slight texture and partial gloss. For a dashboard, matte 3D avoids reflections in the windshield.
Should you choose matte or glossy for a dashboard?
Matte or satin is preferable on the dashboard itself, because a very glossy clear coat reflects light into the windshield depending on the angle of the sun. Gloss is justified on lower and vertical areas — center console, speaker surrounds, door panels — where it does not enter the field of vision and brings out the full depth of the pattern.
Does a real carbon-bonded insert damage the original part?
No, if it is a clipped-in replacement part, like on Audi decorative trim: the original is placed underneath intact and preserved. A trim bonded over the existing one can also be removed with gentle heat and a plastic spatula, but leaves adhesive residue that needs cleaning and can mark plastic already weakened by UV rays.
How many parts are in an insert kit depending on the brand?
It depends entirely on the dashboard architecture. A BMW E90, E92, or F30 divides the interior into many small elements: kits commonly range from eight to fifteen parts. A Golf 7 or 8 concentrates the surfaces into a few large panels: three to six parts are enough. A Tesla Model 3 or Model Y is often reduced to one or two very large blade parts.
Should the carbon pattern be aligned between the parts of the same kit?
Yes, and it is a quality point that is often overlooked. The weave is directional: two adjacent parts whose weaves go in different directions are immediately noticeable, even in low light. A serious kit provides parts with a consistent pattern orientation; check it during the dry fit, before any bonding.
Can a carbon insert yellow or fade over time?
Yes, and it is the clear coat that decides, not the material underneath. A quality UV-resistant polyurethane clear coat lasts five to eight years in an interior; a budget clear coat clouds in two or three summers behind a south-facing windshield. The parts closest to the windshield always age first, regardless of their material.
Can you paint or clear-coat a carbon-effect insert yourself?
This is not recommended on a hydrographic or adhesive film: the solvents in a spray clear coat attack the pattern ink and cause it to bleed. On a genuine composite part, re-coating is possible but requires very fine wet sanding and a spray gun — with a spray can, the result is almost always grainy on such a visible surface.
Does the installation of interior inserts need to be declared?
No. Decorative interior trim does not change any technical characteristic of the vehicle and does not need to appear on the registration certificate. The only limit is safety: nothing must cover an airbag, an airbag label, a sensor, or a control, nor obstruct the driver's vision with a permanent reflection.
Is an adhesive kit or replacement parts better?
The adhesive kit is more affordable, reversible, and requires no disassembly, but it adds thickness and depends entirely on surface preparation. The clipped-in replacement part gives an original finish without added thickness and can be removed without a trace, but it only exists on models whose inserts are designed as removable elements, with Audi leading the way.
Frequent searches: carbon insert, bmw e92 carbon insert, bmw f30 carbon insert, bmw e90 carbon insert, bmw f20 carbon insert, e46 carbon insert, m4 f82 carbon insert, audi a4 b9 carbon insert, audi sq5 carbon insert, golf 4 carbon insert, golf 5 carbon insert, golf 8 carbon insert, golf 7 interior carbon kit, audi rs4 b9 interior carbon kit, audi s4 b8 interior carbon kit, m2 interior carbon pack, tesla model 3 carbon insert, tesla model 3 carbon dashboard, tesla model y carbon dashboard, carbon imitation, carbon sticker imitation, carbon dip imitation, recognize real carbon, real carbon car, real carbon wrapping, 3d carbon vinyl, 5d carbon vinyl, forged carbon vinyl, 3d or 5d carbon, interior car carbon film, interior car carbon film installation, interior car carbon wrapping, car interior carbon wrapping, car interior wrapping price, brushed aluminum car interior wrapping, alcantara car interior wrapping, forged carbon car, forged carbon price, forged carbon wrapping, carbon fiber specific gravity, carbon fiber specific gravity g cm3, carbon fiber composite density, carbon fiber vs aluminum weight, clean carbon fiber, car dashboard trim. Source of queries: Google Suggest fr/fr, report from August 12, 2026 (Ubersuggest out of quota that day: no volume measured, bold words are chosen based on the frequency of suggestions).
Conclusion
Between real carbon and carbon imitation, there is no universal answer: it all depends on the desired use. For a dashboard trim, carbon imitation in ABS stands out in the vast majority of cases as the most rational choice — custom-cut for the exact vehicle, accessible installation, controlled budget, and a very convincing visual result in the interior. Real carbon retains all its meaning for structural parts or projects where the total authenticity of the material takes precedence over any other consideration.
In both cases, the success of the project depends above all on three factors: the choice of a kit specifically cut for the exact model and generation of the vehicle, rigorous surface preparation before bonding, and regular maintenance adapted to the chosen material. By respecting these three simple principles, a carbon imitation trim installed today will retain a near-new finish for many years, for an investment significantly lower than that of an equivalent real carbon trim.
Find all the carbon insert kits for dashboards in our dashboard collection, and to delve deeper into the question, also consult our comparative guide real carbon vs carbon imitation as well as our article on the maintenance of carbon fiber and ABS parts. To extend the customization of the interior, our guide on the leather, Alcantara, or carbon steering wheel cover offers a natural continuation of this type of project, with the same requirements for material choice and installation method.
Recevez nos prochains guides en avant-première
Tutos pose, comparatifs aftermarket vs origine, sélection M Performance/AMG/RS, codes promos exclusifs.